 Save
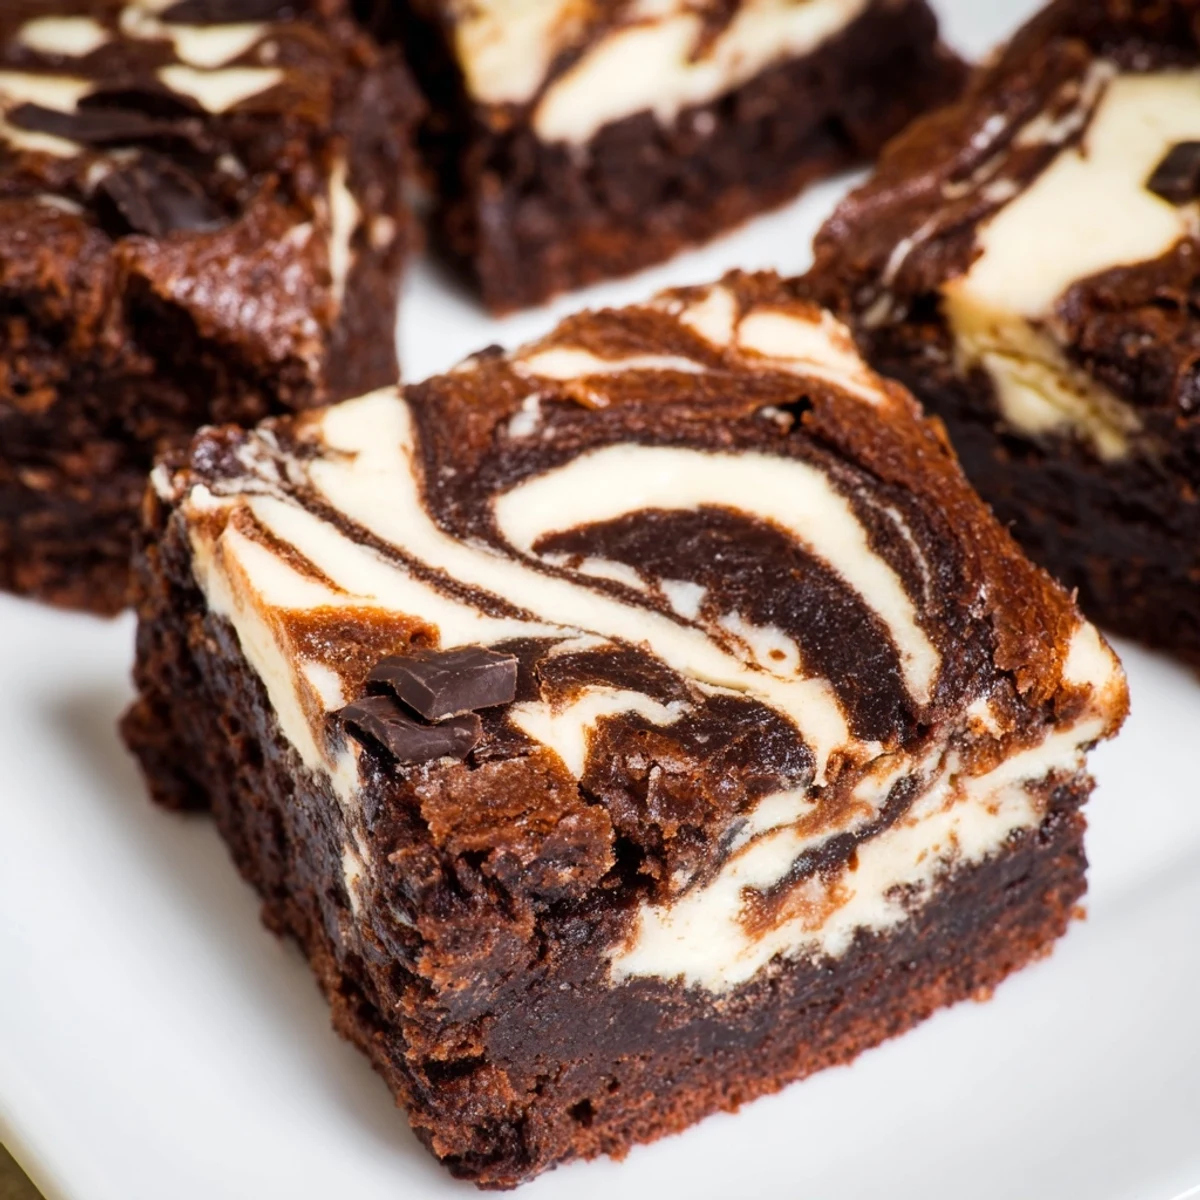
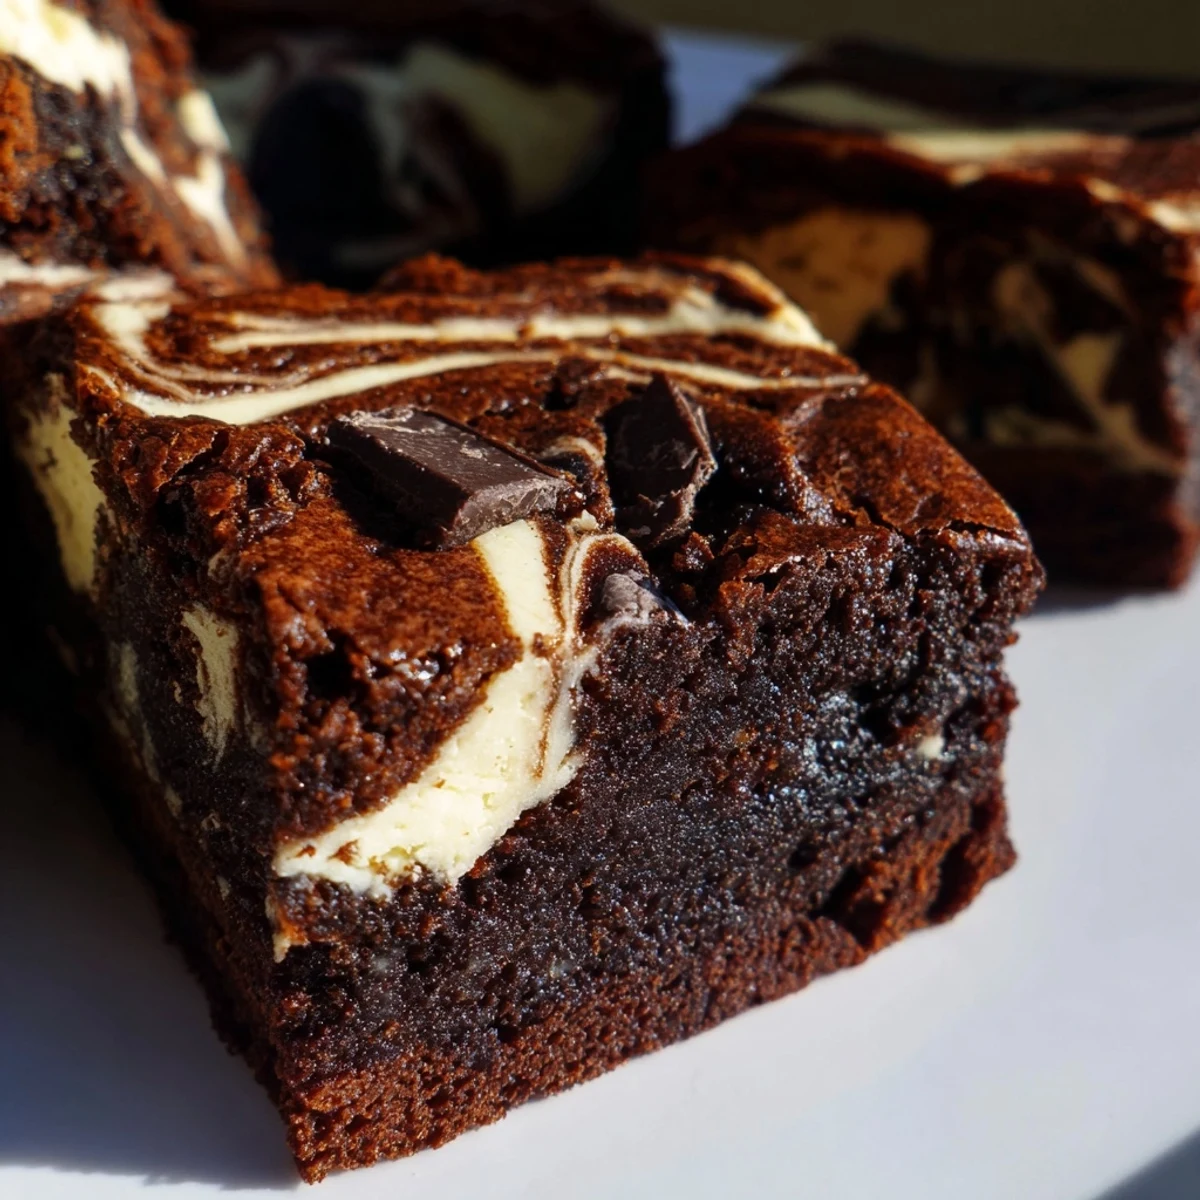
Save These rich chocolate brownies feature a luxurious cream cheese swirl that creates beautiful marbled patterns throughout. The fudgy base uses melted butter, dark chocolate, and cocoa powder for an intense chocolate flavor, while the creamy cheesecake layer adds tangy sweetness that perfectly balances the deep chocolate notes. Best served chilled for clean slices and enhanced fudgy texture.
The moment these emerge from the oven, that swirl of cream cheese against dark chocolate creates something magical. I discovered this combination during a particularly stressful finals week when my roommate needed serious comfort food. Now they are my go-to whenever life feels overwhelming or friends need reminding that everything will be okay.
My sister requested these for her wedding shower and I nervously made triple batches the night before. Watching guests hover around the dessert table, trying to decide which swirled square looked most tempting, made all those hours of swirling worth it. Someone actually asked if I had secretly ordered them from a fancy bakery downtown.
Ingredients
- Unsalted butter (170g/6oz), melted: Using room temperature butter that you melt yourself creates the most velvety texture compared to straight from the fridge
- Granulated sugar (200g/1 cup) and light brown sugar (100g/1/2 cup packed): The combination gives you crackly tops and that chewy center we all chase in brownies
- 2 large eggs: Room temperature eggs incorporate better and prevent the batter from seizing up
- Vanilla extract (1 tsp plus 1/2 tsp for swirl): Do not skip or substitute this ingredient as it bridges the chocolate and cream cheese flavors
- All-purpose flour (100g/3/4 cup + 2 tbsp): Measuring by weight is ideal here since too much flour makes these cakey instead of fudgy
- Unsweetened cocoa powder (60g/2/3 cup): Dutch process cocoa gives a deeper chocolate flavor but natural cocoa works perfectly fine
- Salt (1/2 tsp): This tiny amount intensifies the chocolate without making these taste salty
- Dark chocolate (100g/3.5 oz), chopped or chips: Chop a good quality bar instead of using chips for those satisfying puddles of melted chocolate throughout
- Cream cheese (225g/8 oz), softened: Let this sit out for at least an hour so your swirl layer stays smooth and creamy
- Extra sugar (50g/1/4 cup) and egg (1 large) for cheesecake layer: These create the perfect texture contrast against the dense brownie base
Instructions
- Prep your pan and warm the oven:
- Preheat to 175°C (350°F) and line your 20x20 cm (8x8 inch) pan with parchment paper leaving those overhangs like handles for easy lifting later.
- Make the brownie batter foundation:
- Whisk melted butter with both sugars until completely smooth then beat in eggs and vanilla until glossy and combined.
- Add the dry ingredients:
- Sift flour cocoa and salt into the wet mixture and fold gently just until no dry streaks remain then stir in your chopped dark chocolate.
- Reserve some batter and prep the pan:
- Set aside about 1/4 cup of brownie batter then spread the rest evenly into your prepared pan using an offset spatula.
- Create the cheesecake swirl:
- Beat softened cream cheese until completely smooth then mix in sugar egg and vanilla until combined and creamy.
- Layer and marble the batters:
- Spread cheesecake mixture over the brownie layer then drop spoonfuls of reserved brownie batter on top and swirl with a knife or skewer.
- Bake to just set:
- Bake for 32 to 35 minutes until the center is barely set and a toothpick comes out with a few moist crumbs but not wet batter.
- Cool completely before cutting:
- Let these cool completely in the pan then use the parchment handles to lift out and cut into clean squares.
 Save
Save These became my signature contribution to every office potluck after my department head took one bite during a particularly grueling quarter end. Now whenever someone asks what dessert I am bringing there is a visible ripple of excitement through the room before I even answer.
Getting That Perfect Swirl
The trick to those Instagram worthy marbled lines is not overworking your knife. Just four or five gentle figure eights through the batters creates the most beautiful patterns. I learned this the hard way after turning a perfectly marbled batch into something that looked like muddy tie dye from too much enthusiastic swirling.
Pan Choice Matters
Light colored metal pans produce the most evenly baked brownies with nicely crispy edges. Glass pans take longer to heat up and can result in overbaked edges before the center sets while dark pans cook too fast making it difficult to get that perfect fudgy texture throughout.
Storage and Serving Tips
These actually improve after a night in the refrigerator as the flavors meld and the texture becomes even more decadent. Serve them at room temperature for the best experience though because cold brownies lose some of that fudgy mouthfeel we all love.
- Place a piece of parchment between layers if stacking for storage
- These freeze beautifully for up to three months if wrapped tightly
- A quick 10 second zap in the microwave makes them taste freshly baked
 Save
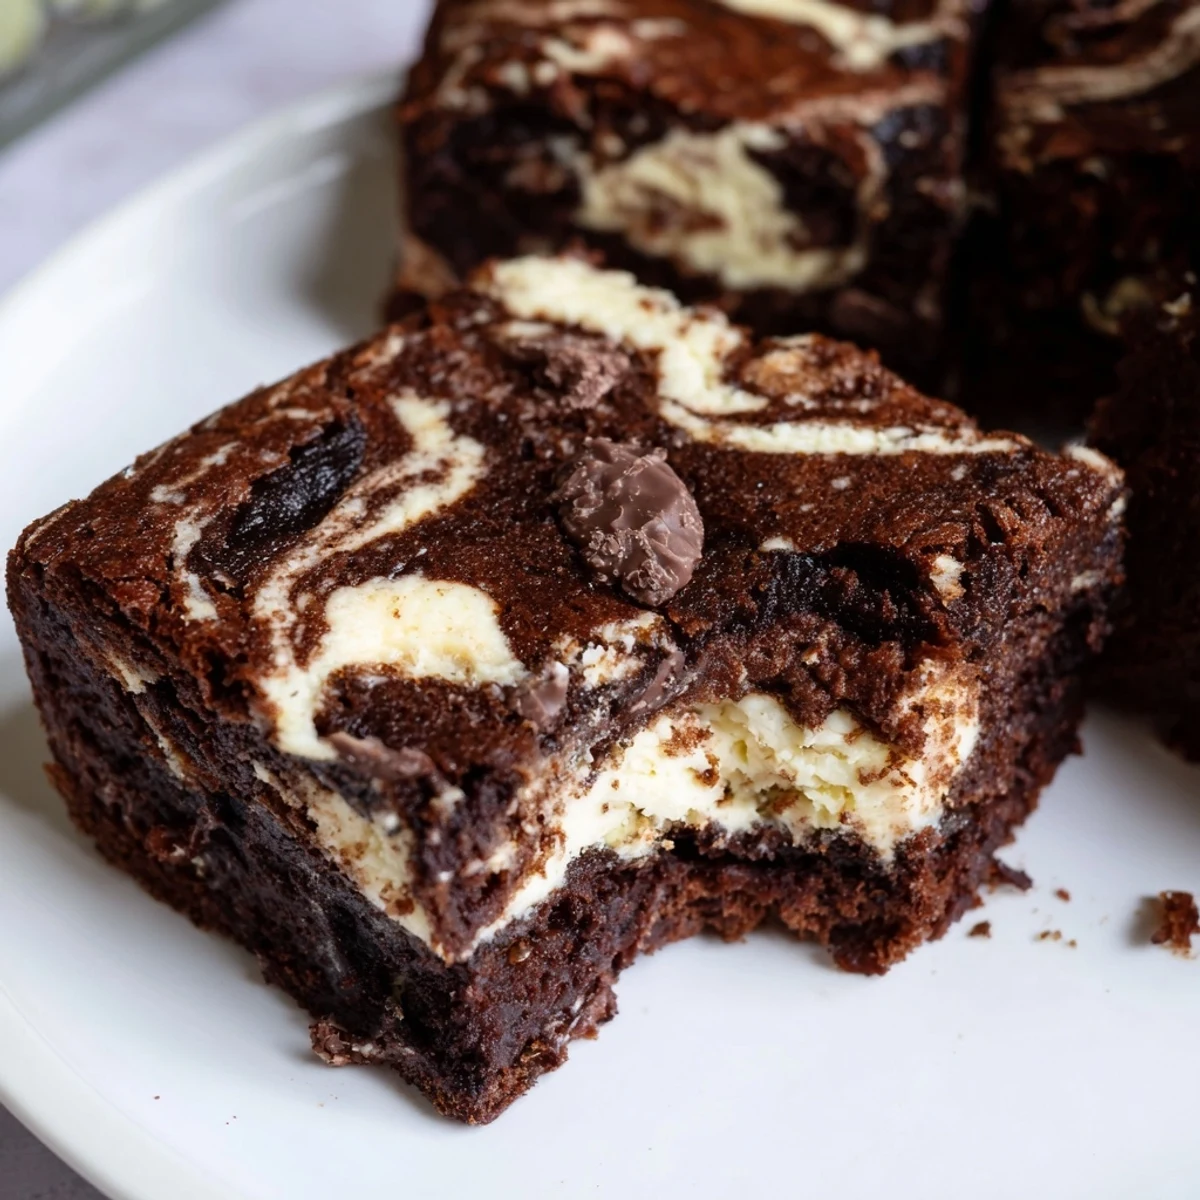
Save There is something deeply satisfying about cutting into that marbled surface and seeing the two distinct layers come together on your fork. Hope these become your new favorite reason to turn on the oven.
Recipe Questions & Answers
- → How do I know when the brownies are done baking?
-
The brownies are ready when the center is just set and a toothpick inserted comes out with a few moist crumbs. The edges should be slightly pulled away from the pan sides.
- → Can I make these ahead of time?
-
Yes, these actually improve when made ahead. Store in an airtight container in the refrigerator for up to 5 days. The flavors develop and the texture becomes even fudgier after chilling.
- → Why should I chill before cutting?
-
Chilling makes cutting much easier and produces cleaner squares. The cold firms up both the chocolate and cheesecake layers, preventing them from smearing when sliced.
- → Can I use milk chocolate instead of dark?
-
You can substitute milk chocolate, but the result will be sweeter and less intense. For the best balance with the tangy cheesecake swirl, dark chocolate (60-70% cocoa) works beautifully.
- → What's the best way to create the marble effect?
-
Drop spoonfuls of reserved brownie batter over the cheesecake layer, then use a knife or skewer to gently swirl through both layers. Don't over-swirl or you'll lose the distinct marble pattern.
- → Can I freeze these brownies?
-
Absolutely. Wrap individual squares tightly in plastic wrap and freeze for up to 3 months. Thaw overnight in the refrigerator for best texture.