 Save
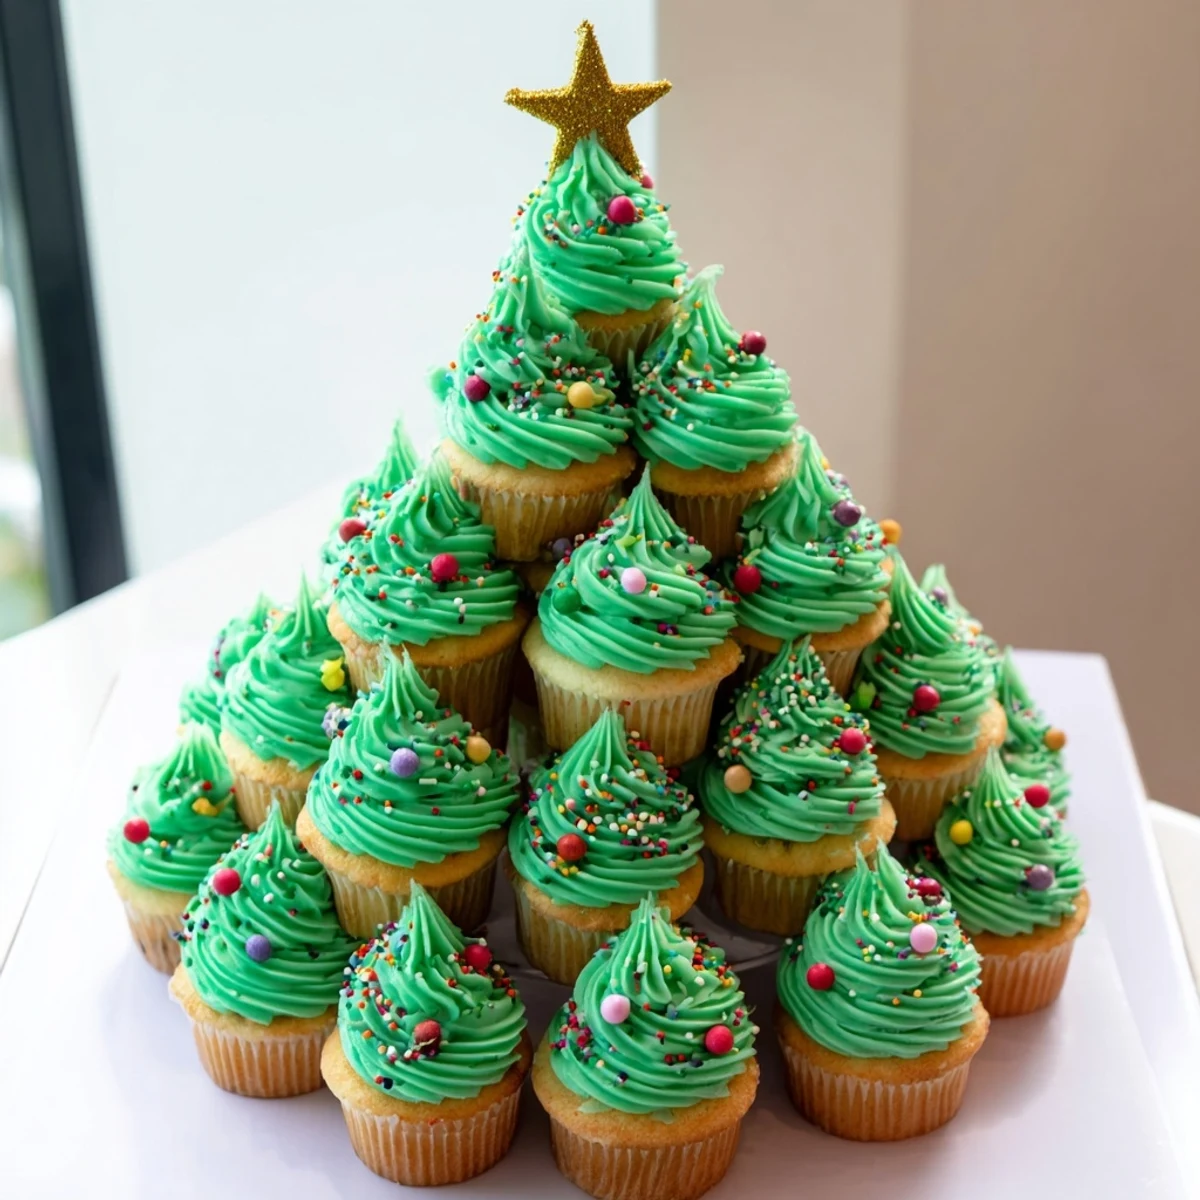
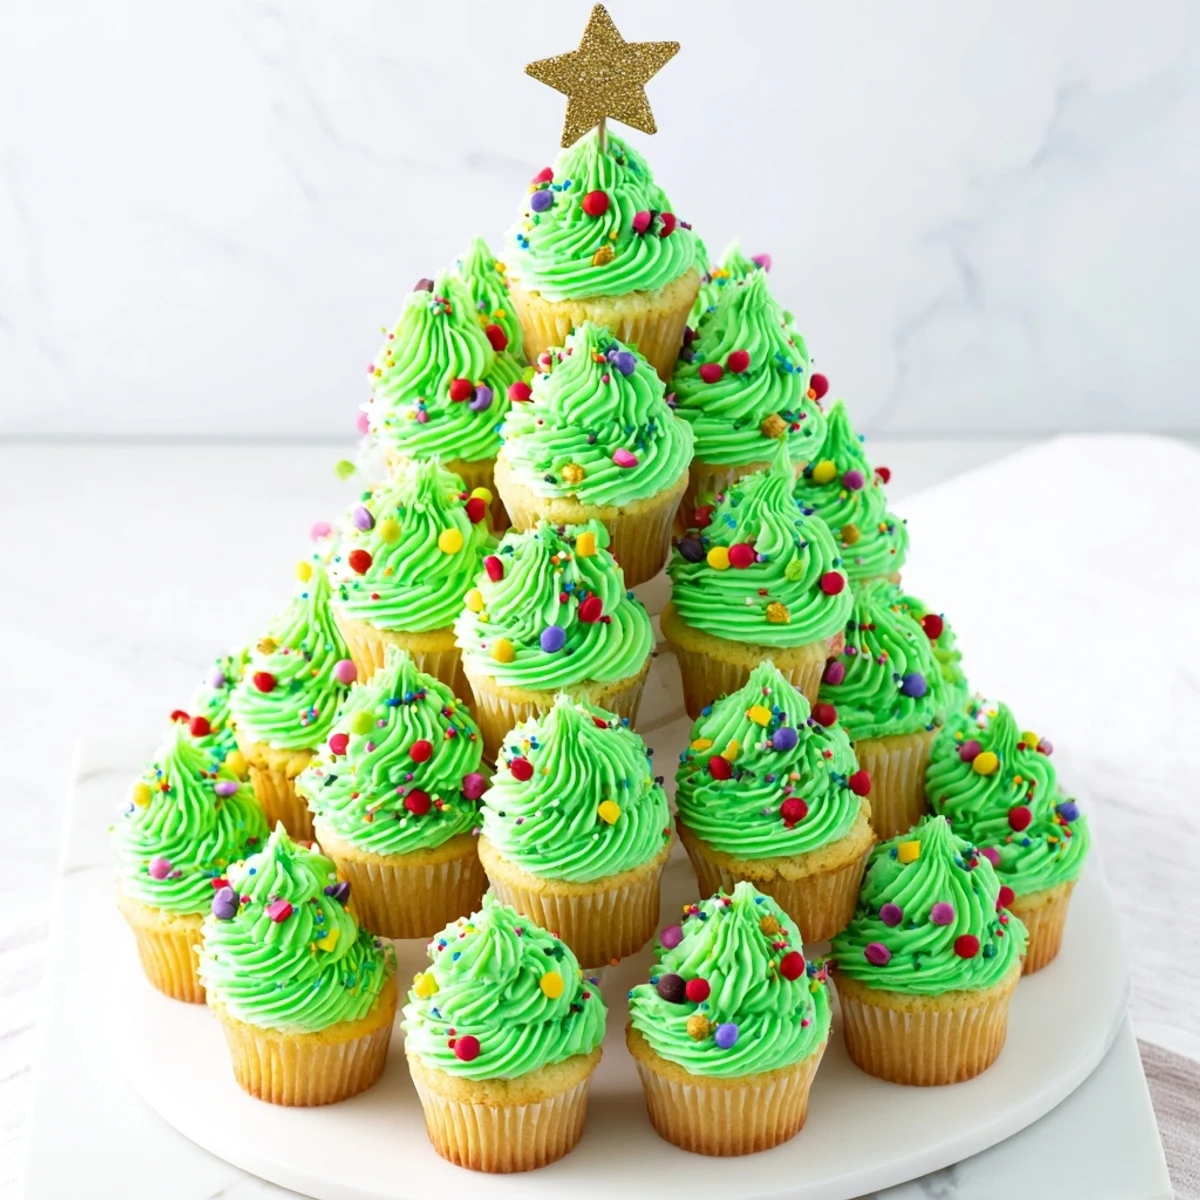
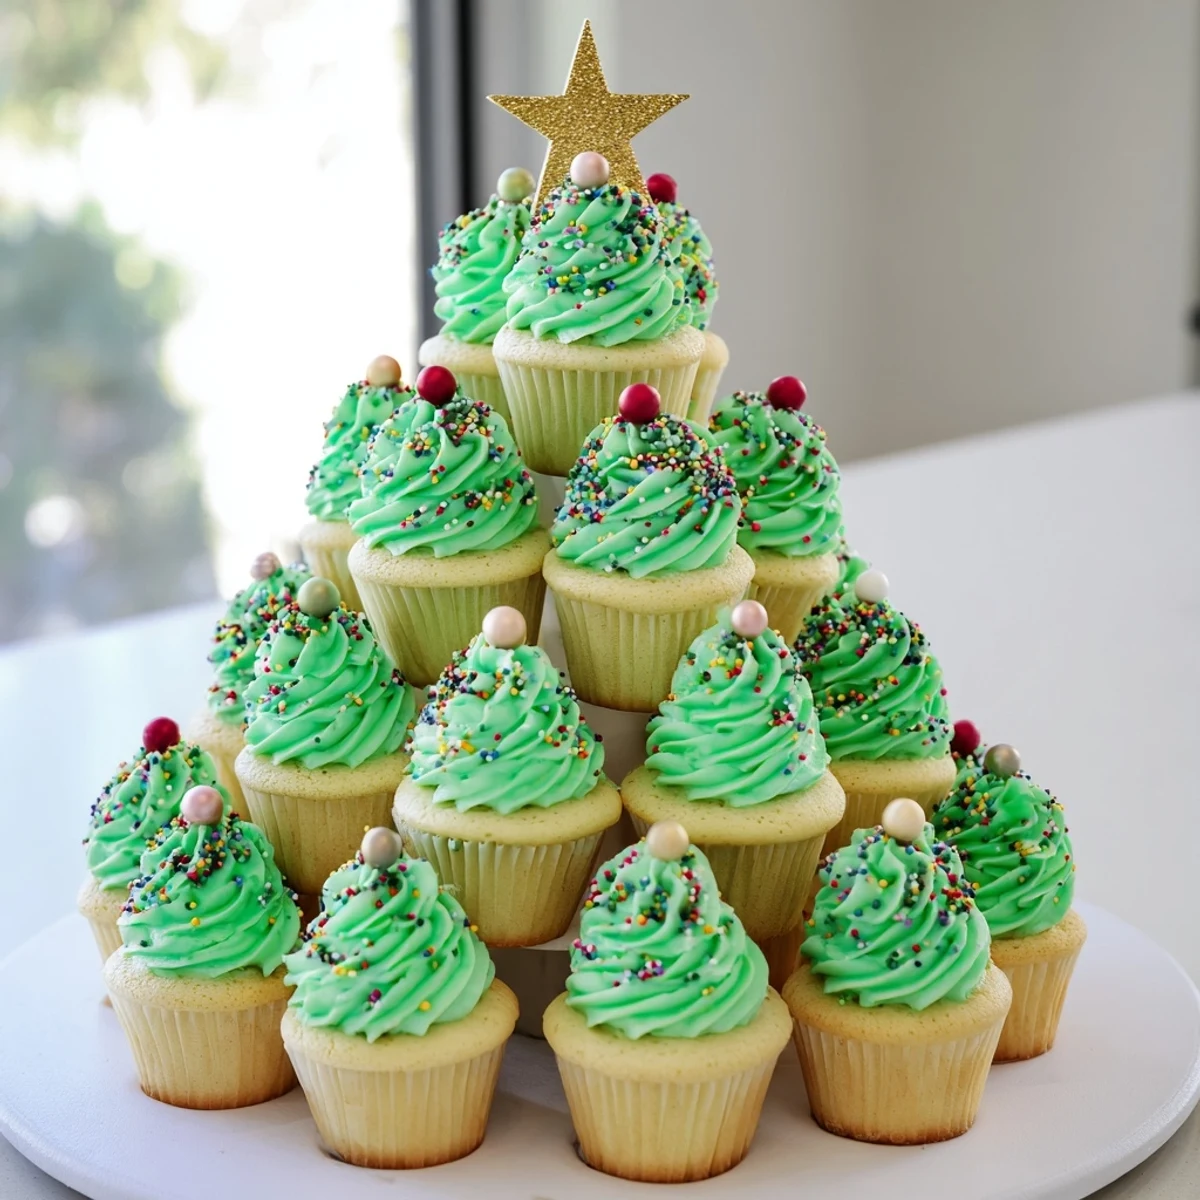
Save Build an impressive holiday centerpiece by arranging 24 vanilla cupcakes into a triangular tree formation, topping each with fluffy green buttercream and festive decorations. This stunning display takes about an hour from start to finish and serves as both dessert and decoration for your Christmas gathering.
The foundation starts with classic vanilla cupcakes baked until golden, then crowned with vibrant green buttercream piped into tall swirls. Arrange them in tiers—seven at the base, decreasing to one at the peak—then adorn with sprinkles as ornaments and crown with an edible gold star.
Customize with chocolate cupcakes, add coconut snow, or build around a foam cone for extra stability. Perfect alongside hot cocoa or mulled wine, this edible tree brings festive cheer to any dessert table.
My sister called me at 11 PM the night before her office Christmas party, completely panic-stricken because she'd promised to bring a showstopper dessert and hadn't baked anything. I talked her off the ledge with this cupcake tree idea, and she texted me five photos of her coworkers gathering around it like it was the Mona Lisa. Apparently someone asked if she'd hired a professional baker.
Last December, my three-year-old nephew spotted the sprinkles bowl and decided the tree needed more ornamentation while I turned my back for thirty seconds. I came back to find about forty percent of the sprinkles had migrated to his face and the kitchen floor, which honestly made the final result look like it had survived a tinsel explosion. Everyone agreed it added character.
Ingredients
- All-purpose flour: The structural foundation of your cupcake empire, dont pack it down when measuring
- Baking powder and baking soda: The dynamic duo that makes these cupcakes rise properly and taste like celebration not sadness
- Unsalted butter: Room temperature is non negotiable here, cold butter creates sad lumpy batter
- Granulated sugar: Creates that lovely tender crumb structure we all want in our holiday baking
- Eggs: Also room temperature, they incorporate better and your texture will thank you
- Vanilla extract: Pure extract please, your holidays deserve the real thing
- Whole milk: The fat content keeps these moist, I learned this lesson the hard way with skim milk once
- Powdered sugar: Sift it first or your frosting will have stubborn lumps that mock your efforts
- Green gel food coloring: Gel is way more intense than liquid, start small and add more
- Multicolored sprinkles: The ornaments, get the good ones that dont bleed color everywhere
- Edible gold star: The crowning glory, without this it just looks like a green triangle
Instructions
- Preheat your paradise:
- Get your oven to 350°F and line those muffin pans with liners now, not when your batter is sitting there waiting
- Whisk the dry team:
- Combine flour, baking powder, baking soda, and salt in a bowl, give it a little whisk to aerate everything
- Cream like you mean it:
- Beat that butter and sugar until its actually light and fluffy, like seriously 3 to 5 minutes, this is where the magic happens
- Bring in the eggs:
- Add them one at a time, beating well after each, then stir in the vanilla
- The alternating dance:
- Add dry ingredients in three parts, alternating with milk, starting and ending with flour, stop mixing as soon as you see the last streak of flour
- Bake your little gifts:
- Fill those liners two-thirds full, 18 to 20 minutes until a toothpick comes out clean, then let them cool completely before you even think about frosting
- Make the green magic:
- Beat butter until creamy, gradually add powdered sugar, then vanilla and milk until you have spreading consistency, then add green gel until you hit that perfect Christmas tree shade
- Pipe it up:
- Use a large star tip and pipe tall swirls on each completely cool cupcake, this is your tree canopy
- Build your masterpiece:
- Arrange them in a tree shape on your serving board, seven at the base, then six, five, four, two, and finally one at the tippy top
- Make it merry:
- Scatter those sprinkles like ornaments, crown it with your gold star, add any extra decorations your heart desires
 Save
Save My grandmother saw this at our family gathering last year and immediately declared it the most clever thing shed seen in eighty years of hosting Christmas. She made me take about twelve photos of it from different angles because she wanted to show her bridge club, and honestly Ive never felt prouder of a dessert in my life.
Building A Stable Foundation
If you're transporting this masterpiece, I highly recommend using a sturdy piece of cardboard or a actual baking sheet as your base. The year I used a decorative platter, every single turn in the car made me hold my breath, and by the time we arrived, three cupcakes had migrated into each other like they were trying to escape.
Frosting Like A Pro
That tall swirl shape isnt just for looks, it creates little nooks and crannies for your sprinkles to nestle into. I spent one afternoon practicing my piping technique on a plate before the real thing, and my sister walked in, assumed I had lost my mind, and then immediately asked me to teach her.
Make Ahead Magic
You can bake the cupcakes two days ahead and freeze them undecorated, which is honestly a lifesaver during holiday chaos. The morning of your event, just let them thaw on the counter while you make your frosting and nobody will ever know you were basically eating dessert for breakfast while assembling this.
- Bake and freeze cupcakes up to one week ahead if your freezer space allows
- Make your frosting the day before and store it in the fridge, let it come to room temperature before piping
- Assemble the tree no more than four hours before serving or those swirls will start to droop
 Save
Save Theres something genuinely joyful about building a Christmas tree out of cupcakes, like youre creating edible architecture that brings people together before they even take a bite. May your holidays be sweet, your sprinkles plentiful, and your frosting perfectly green.
Recipe Questions & Answers
- → How far in advance can I make the cupcake tree?
-
Bake cupcakes up to two days ahead and store in an airtight container. Prepare buttercream frosting 1-2 days before and refrigerate. Bring frosting to room temperature before piping. Assemble and decorate the tree on the day of serving for best results and structural integrity.
- → What's the best way to transport the cupcake tree?
-
Transport cupcakes unfrosted in sturdy containers, then assemble and frost at your destination. If you must transport assembled, use a large cutting board or flat platter with non-slip mat underneath. Drive carefully and keep the display flat and level.
- → Can I use different flavors for the cupcakes?
-
Absolutely. Chocolate, red velvet, or spice cakes all work beautifully with green buttercream. Just ensure your batter yields 24 cupcakes and keep baking times similar—18-20 minutes at 350°F until a toothpick tests clean.
- → How do I make the tree structure more stable?
-
For added stability, use a foam cone wrapped in foil as a base and attach cupcakes with toothpicks. Alternatively, arrange cupcakes directly on a sturdy board, applying a small dab of buttercream under each to anchor them in place before piping the tall swirls.
- → How many people does this cupcake tree serve?
-
This tree yields 24 standard cupcakes, comfortably serving 12-24 guests depending on whether attendees take one or two cupcakes. It's ideal for medium-sized holiday gatherings, office parties, or family dessert tables where the display doubles as decoration.