Save
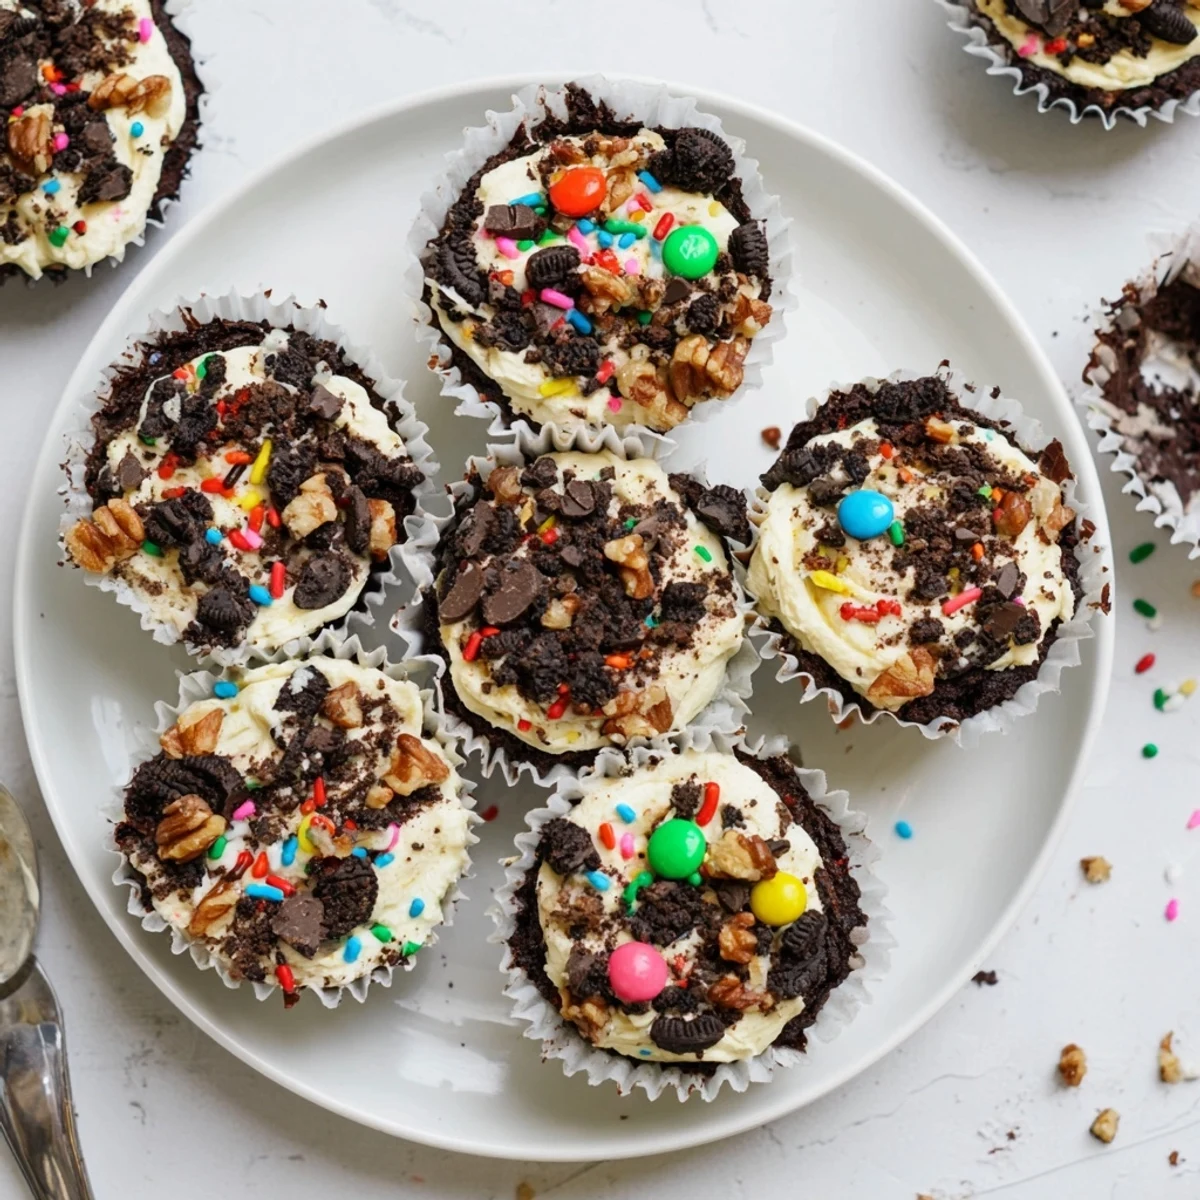
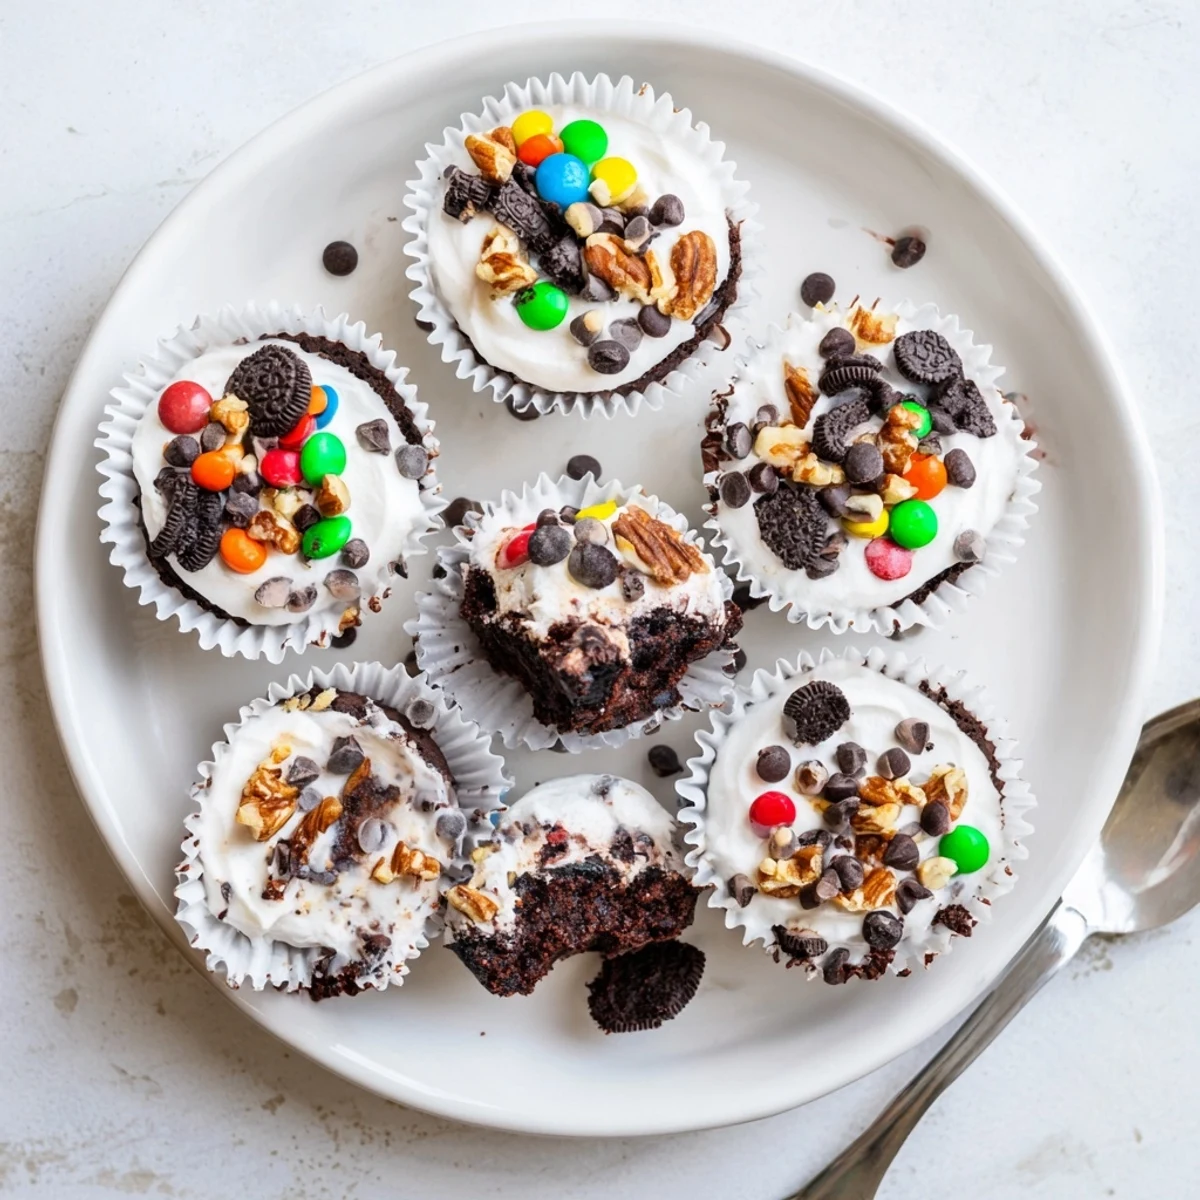
Save These indulgent brownie cheesecake cups combine the best of both worlds—a rich, fudgy chocolate brownie base topped with silky smooth cheesecake filling. The magic happens when you pile on the loaded toppings: mini chocolate chips, crunchy pecans or walnuts, crushed Oreos, and colorful mini M&Ms create a dessert that's as visually stunning as it is delicious. Perfect for parties, celebrations, or whenever you need a crowd-pleasing treat that looks impressive but comes together in under an hour. The contrast between the dense brownie, creamy cheesecake, and crunchy mix-ins creates an irresistible texture that keeps everyone coming back for more.
The smell of brownies baking has this way of stopping everyone in their tracks, wandering into the kitchen with that hopeful look. I started making these cups on a whim when I couldn't decide between brownies and cheesecake for a potluck, so I just smashed them together in muffin tins and hoped for the best. Now they're the first thing to disappear at every gathering, and I've learned to always make a double batch because people go back for seconds.
Last summer my niece helped me make these for her birthday party, and she took complete creative control over the topping arrangements. Some cups got mountains of crushed Oreos, others had careful patterns of M&Ms, and a few had everything we could fit. The pride on her face when everyone kept asking who made them was absolutely worth the extra colorful mess in my kitchen.
Ingredients
- 120 g (1/2 cup) unsalted butter: Melt it gently and let it cool slightly before mixing to avoid scrambling the eggs later
- 150 g (3/4 cup) granulated sugar and 75 g (1/2 cup + 1 tbsp) brown sugar: The combination creates that perfect crackly top while keeping the inside fudgy
- 2 large eggs: Room temperature eggs incorporate better and create a smoother texture
- 1 tsp vanilla extract: Use real vanilla here since it shines through the rich chocolate
- 65 g (3/4 cup) unsweetened cocoa powder: Dutch-processed cocoa gives the deepest chocolate flavor
- 65 g (1/2 cup) all-purpose flour: Don't overmix once you add the flour or the brownies get cakey instead of fudgy
- 1/2 tsp salt: Enhances the chocolate flavor and balances the sweetness
- 225 g (8 oz) cream cheese: Let it soften completely on the counter for at least an hour to avoid lumps
- 60 g (1/4 cup) granulated sugar: Just enough to sweeten the cheesecake without making it cloying
- 1 large egg: Room temperature helps it blend seamlessly into the cream cheese
- 1 tsp vanilla extract: This second dose of vanilla bridges the chocolate and cheesecake layers
- 60 g (1/3 cup) each of mini chocolate chips, chopped pecans or walnuts, crushed Oreos, and mini M&Ms: These are your loaded toppings but feel free to swap in whatever speaks to you
Instructions
- Get your oven ready:
- Preheat to 175°C (350°F) and line your 12-cup muffin tin with paper liners, which make removing the cups so much easier and add to the party vibe.
- Make the brownie batter:
- Melt the butter in a medium bowl, whisk in both sugars until glossy, then add eggs and vanilla. Sift in cocoa, flour, and salt, folding until just combined.
- Layer the base:
- Divide the brownie batter evenly among the muffin cups, using about one heaping tablespoon per cup. Don't worry about spreading it perfectly.
- Whip up the cheesecake filling:
- Beat the softened cream cheese until smooth, add sugar, egg, and vanilla, and keep mixing until creamy and completely lump-free.
- Add the swirl:
- Spoon about one tablespoon of cheesecake mixture over each brownie base, gently smoothing the tops without pressing too hard.
- Load them up:
- Sprinkle each cup generously with your chosen toppings, pressing them lightly so they stick but don't sink into the cheesecake layer.
- Bake to perfection:
- Bake for 22 to 25 minutes until the cheesecake is set and brownie edges feel firm, though the centers will still be slightly soft.
- Let them cool completely:
- Cool in the pan for 10 minutes, transfer to a wire rack, then chill for at least one hour before serving for the best texture and flavor.
 Save
Save My friend Sarah swears these helped her survive final exams in college, showing up at study sessions with a container of them and becoming the most popular person in the library. There's something about having your own perfectly portioned dessert that feels like such a treat, especially when life gets overwhelming and you need something just for yourself.
Topping Combinations That Work
After years of experimenting, I've found that mixing textures and flavors creates the most interesting cups. Try crushed pretzels with white chocolate chips for that sweet-salty punch, or go completely over the top with peanut butter cups and chopped Reese's. The key is pressing the toppings gently into the cheesecake layer so they bake in instead of rolling off when you take that first bite.
Make-Ahead Magic
These cups freeze beautifully for up to three months, and I always keep a stash in my freezer for unexpected dessert emergencies. Wrap them individually in plastic wrap and foil, then thaw in the refrigerator overnight. The texture holds up surprisingly well, though the fresh ones still have that perfect slightly warm cheesecake swirl that's hard to beat.
Serving Suggestions
While these are spectacular on their own, a dollop of freshly whipped cream or a scoop of vanilla ice cream turns them into restaurant-worthy desserts. I've also served them alongside a steaming mug of dark roast coffee during brunch, where the contrast between hot coffee and chilled cheesecake creates this amazing moment that makes people close their eyes and sigh.
- Let them sit at room temperature for 15 minutes before serving so the flavors really wake up
- Use a small offset spatula or butter knife to gently release the liners if they stick
- Store them in a single layer in the fridge to prevent the toppings from getting crushed
 Save
Save Every time I pull a batch of these from the oven, I'm reminded that sometimes the best kitchen experiments come from indecision and a what if mindset. Hope they become your go-to for celebrations, comfort, and those moments when only something chocolate will do.
Recipe Questions & Answers
- → Can I make these brownie cheesecake cups ahead of time?
-
Yes, these cups actually taste better when made ahead. They need at least 1 hour of chilling time for the best texture and flavor development. You can prepare them up to 2 days in advance and store them refrigerated in an airtight container. The chilling helps the cheesecake set properly and allows the flavors to meld together beautifully.
- → Can I freeze these loaded brownie cups?
-
These freeze exceptionally well for up to 3 months. Place the cooled cups in a single layer on a baking sheet and freeze until firm, then transfer to a freezer-safe container or bag. Thaw overnight in the refrigerator before serving. The texture remains nearly identical to fresh, making them perfect for batch preparation.
- → What other toppings work well for these cups?
-
The topping possibilities are endless. Try peanut butter chips, toffee bits, shredded coconut, crushed pretzels, chopped Reese's cups, or graham cracker crumbs. For a more sophisticated version, use dark chocolate chunks, toasted almonds, or sea salt flakes. You can customize each cup with different toppings or create a uniform batch with your favorites.
- → How do I know when the cheesecake layer is properly baked?
-
The cheesecake is done when the edges are set and slightly puffy, but the center still has a slight jiggle when you gently shake the pan. It will continue to firm up as it cools. Overbaking causes cracks and a dry texture, so start checking at 22 minutes. The brownie edges should feel firm to the touch while the centers remain moist and fudgy.
- → Can I make these gluten-free?
-
Absolutely. Simply replace the all-purpose flour with a reliable 1:1 gluten-free flour blend that contains xanthan gum. The texture remains wonderfully fudgy and no one will notice the difference. Just ensure all your toppings, particularly the Oreos, are certified gluten-free varieties, and you're all set.
- → Why did my cheesecake layer crack on top?
-
Cracking usually happens from overbaking or too rapid temperature changes. Ensure you don't exceed 25 minutes and avoid opening the oven door frequently during baking. Let them cool gradually in the pan before transferring to the rack. Even if small cracks appear, they'll be hidden under the generous layer of toppings anyway.