 Save
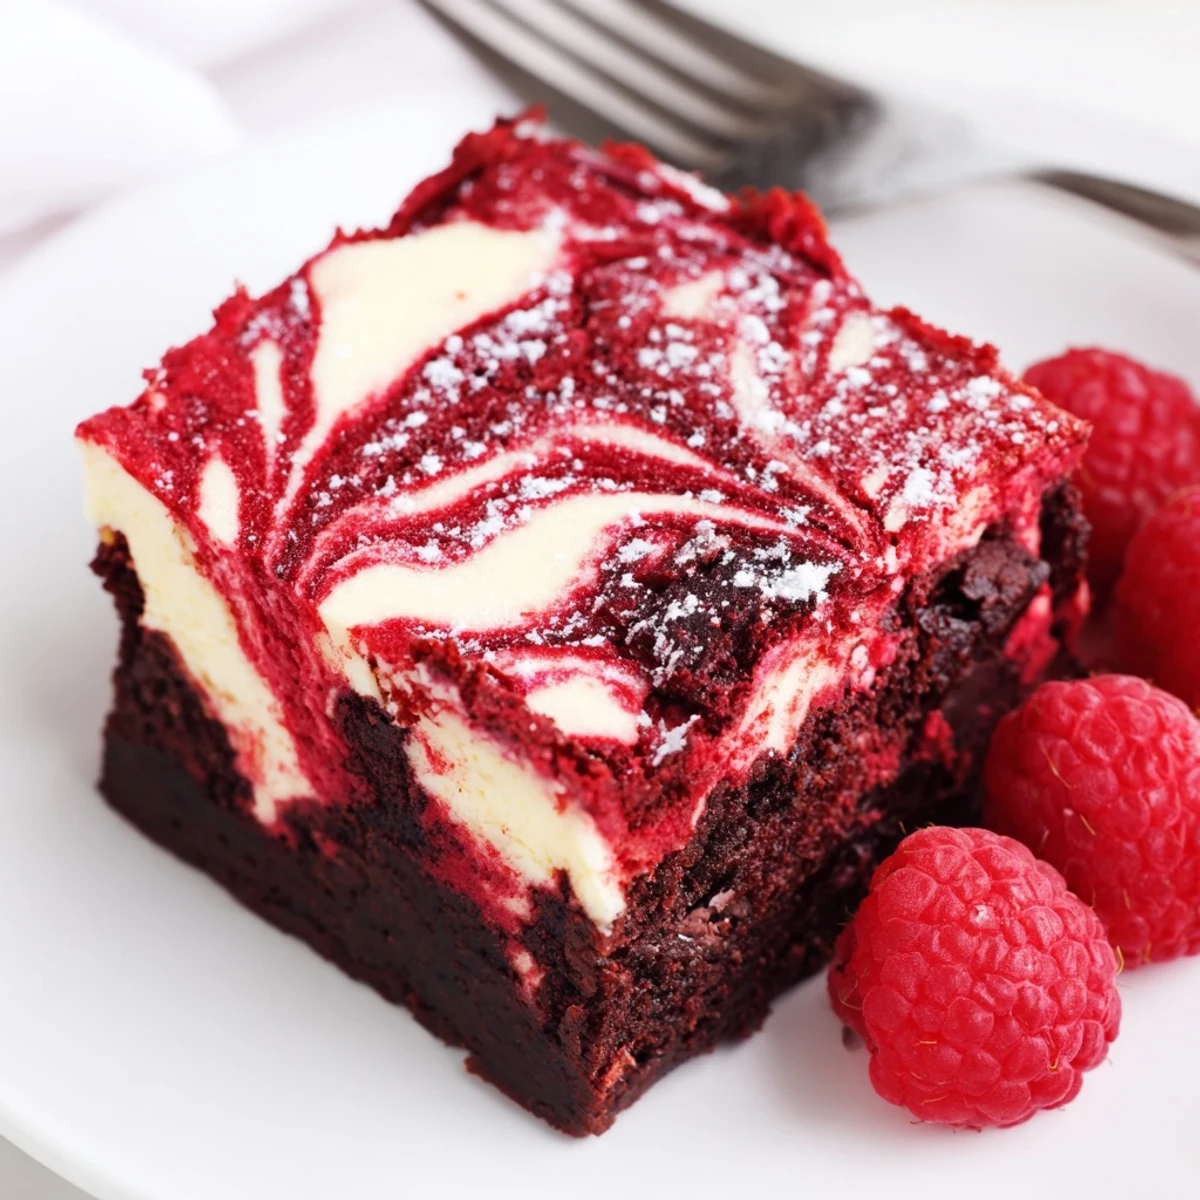
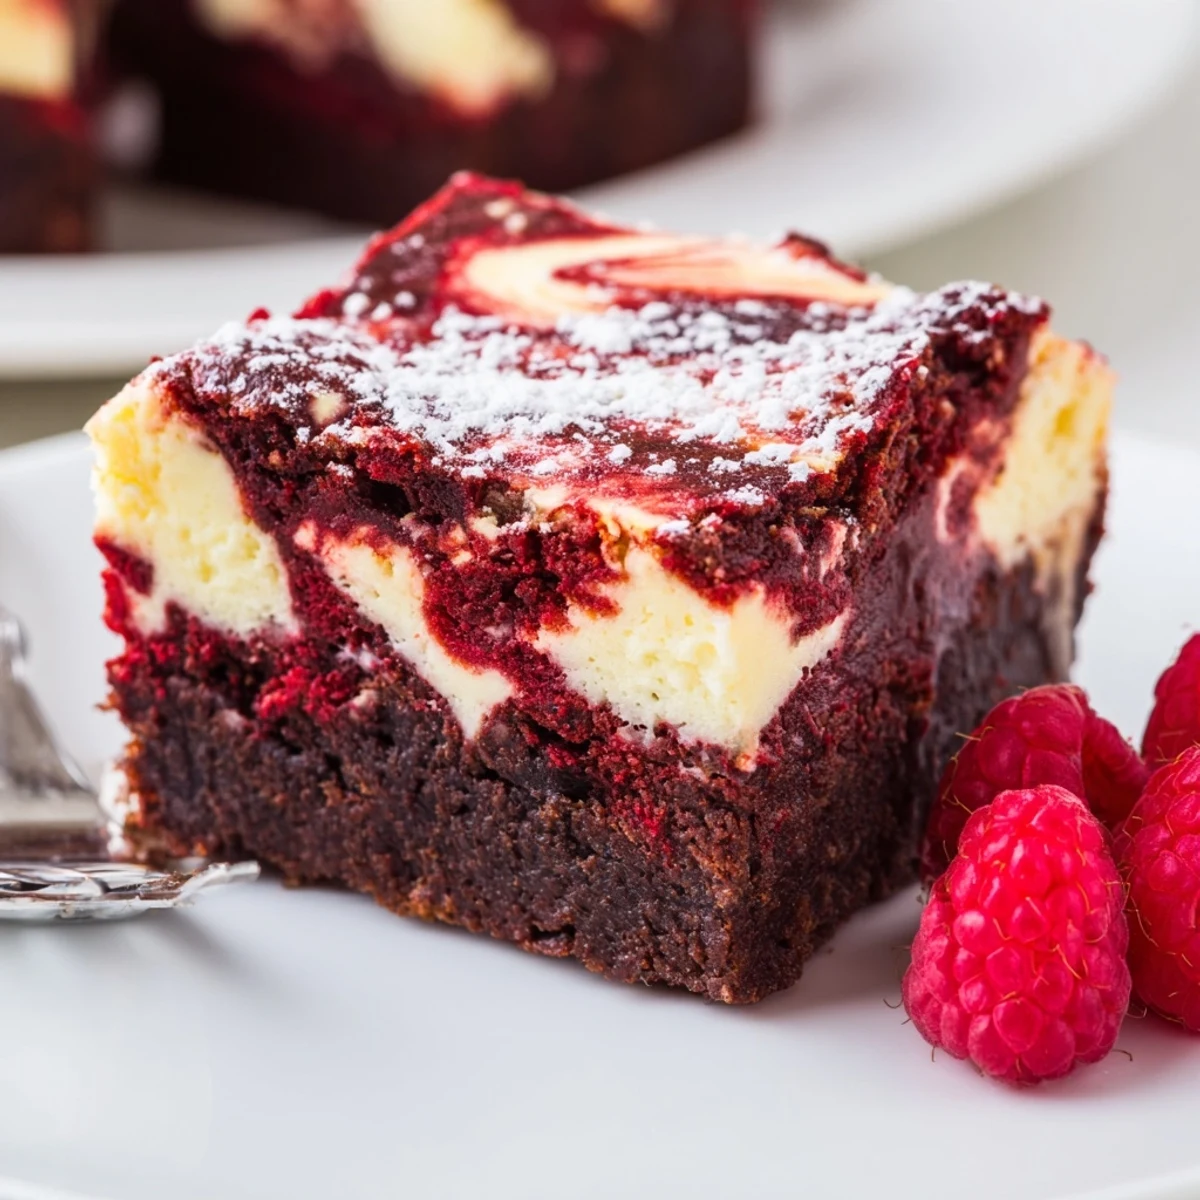
Save This decadent bake layers fudgy red velvet batter beneath a smooth, tangy cheesecake filling for a marbled finish. Melt butter and whisk with sugar, eggs, vanilla and red coloring, then fold in sifted flour, cocoa and salt. Spread most batter in an 8-inch pan, pour the cheesecake mix, dot with reserved batter and swirl. Bake until center is set, cool completely and chill at least 1 hour before slicing for clean bars.
The scent of butter and vanilla curling through the kitchen always feels like a subtle invitation, but when I first swirled cheesecake into a batch of deep-red brownie batter, I was surprised at just how much it felt like painting. That moment the ruby batter met the creamy topping, marbling together in hypnotic patterns, I knew this recipe was more than your average dessert. Red velvet with cheesecake is admittedly a little extra, but sometimes those are the desserts we remember most. One spring afternoon, I threw these together with little more than curiosity—and ended up with a new celebration staple.
Once, I made these brownies while a thunderstorm rattled the windowpanes, and the whole apartment glowed with a warm, sugary buzz. My partner wandered in, mid-chill, just as I pulled the pan from the oven—a perfect excuse to huddle at the counter together, watching the swirl set and dreaming aloud about midnight snacks.
Ingredients
- Unsalted butter: Melted butter makes the brownies incredibly fudgy and easy to mix by hand.
- Granulated sugar: Gives both brownie and cheesecake layers that sweet, toothsome texture.
- Large eggs: Room temperature eggs blend more smoothly—let them sit out while prepping.
- Vanilla extract: A splash in both layers transforms the whole dessert from good to crave-worthy.
- Red food coloring: Use gel for the most intense color, but liquid works in a pinch; just adjust for vibrancy.
- All-purpose flour: Sifting it in prevents lumps and keeps the brownie moist.
- Unsweetened cocoa powder: Just enough for a subtle chocolatey depth without overpowering the red velvet vibe.
- Salt: A tiny bit sharpens all the flavors—don’t skip it.
- Cream cheese: Softened cream cheese lets you whip up a silky-smooth swirl; let it sit out well ahead.
Instructions
- Prep your pan:
- Set your oven to 175°C (350°F). Line a square 20 x 20 cm pan with parchment, leaving enough overhang to lift out the brownies later.
- Mix red velvet base:
- Whisk melted butter and sugar in a bowl so they almost shimmer. Beat in eggs, vanilla, and red food coloring until it’s glossy and vivid.
- Fold in dry ingredients:
- Sift flour, cocoa, and salt right into the bowl, then gently fold until just combined—treat the batter tenderly for that fudgy bite.
- Layer the base:
- Scoop out about 3/4 of the batter to spread in the pan’s bottom, saving the rest for marbling magic.
- Make cheesecake swirl:
- Use a new bowl to beat cream cheese and sugar until creamy, then add egg and vanilla—watch it transform silky and pale.
- Pour and swirl:
- Gently pour the cheesecake mixture over the red velvet layer and smooth it evenly. Drop spoonfuls of the reserved red velvet batter on top, then use a knife to create wild, artistic swirls (don’t overdo it) for the perfect marble effect.
- Bake:
- Slide the pan into the oven and bake 33–37 minutes, until the edges are set and the center only wobbles slightly when nudged.
- Cool and chill:
- Cool completely in the pan, then chill for at least an hour in the fridge. Waiting is the hardest part, but slicing into chilled brownies is worth every second.
 Save
Save A late summer evening, we served these brownies after a rooftop dinner with friends. The first bite, with the sun setting and laughter bouncing off the walls, made me realize a great dessert can turn simple gatherings into small celebrations.
When Swirling Gets Fun (Or Messy)
I’ve accidentally gone overboard with swirling, and while the results may look chaotic, they always taste fantastic. The trick is to stop swirling sooner than you think—less is more for picture-perfect marbling. Sometimes, the ‘oops!’ swirls are the ones your guests fight over for their quirky charm.
Making It Your Own
I’ve tried folding in chocolate chips, using orange zest for a bright twist, or sprinkling a touch of sea salt on top before baking. Each experiment led to a new favorite, so don’t be afraid to play. Your brownies, your canvas!
Serve Chilled, Savor Slowly
The days I attempted to cut these before they were fully set, I ended up with gooey, delicious chaos—barely brownies, more like red velvet cheesecake fudge. Letting them chill ensures clean cuts and perfect layered bites every time. If you’re impatient, plunge your knife in hot water before slicing—it works wonders!
- Let the brownies cool fully in the pan before even thinking about slicing.
- Store leftovers in the fridge to keep the cheesecake layer fresh.
- Dust with powdered sugar or top with berries for a simple finish.
 Save
Save There’s something quietly celebratory about a pan of these red velvet cheesecake brownies. However you swirl them, they’re always met with a smile.
Recipe Questions & Answers
- → How do I know when the bars are done?
-
Insert a toothpick into the center — it should come out mostly clean with a few moist crumbs. The cheesecake top will be set but still slightly jiggly in the very center; it firms as it cools and chills.
- → Can I use gel food coloring for richer color?
-
Yes. Gel coloring provides a deeper hue with less liquid, so add it sparingly until you reach the desired shade without thinning the batter.
- → What can I substitute for cream cheese?
-
Mascarpone gives a richer, smoother fill; full-fat ricotta (blended until smooth) yields a lighter texture. Adjust sugar slightly if using milder alternatives to preserve tang.
- → Why does the cheesecake layer crack or sink?
-
Overbaking or rapid temperature changes cause cracks and sinking. Bake until just set, avoid overmixing the cheesecake (to limit incorporated air), and cool gradually before chilling to stabilize the structure.
- → How should I store and make these ahead?
-
Store chilled in an airtight container for up to 4 days. For longer storage, freeze slices wrapped tightly for up to 2 months; thaw in the refrigerator before serving for best texture.
- → Any tips for a cleaner marble effect?
-
Reserve a small portion of brownie batter to dollop on top, then use a skewer or knife with gentle, shallow swirls. Avoid over-swiping to keep distinct ribbons of color and texture.