 Save
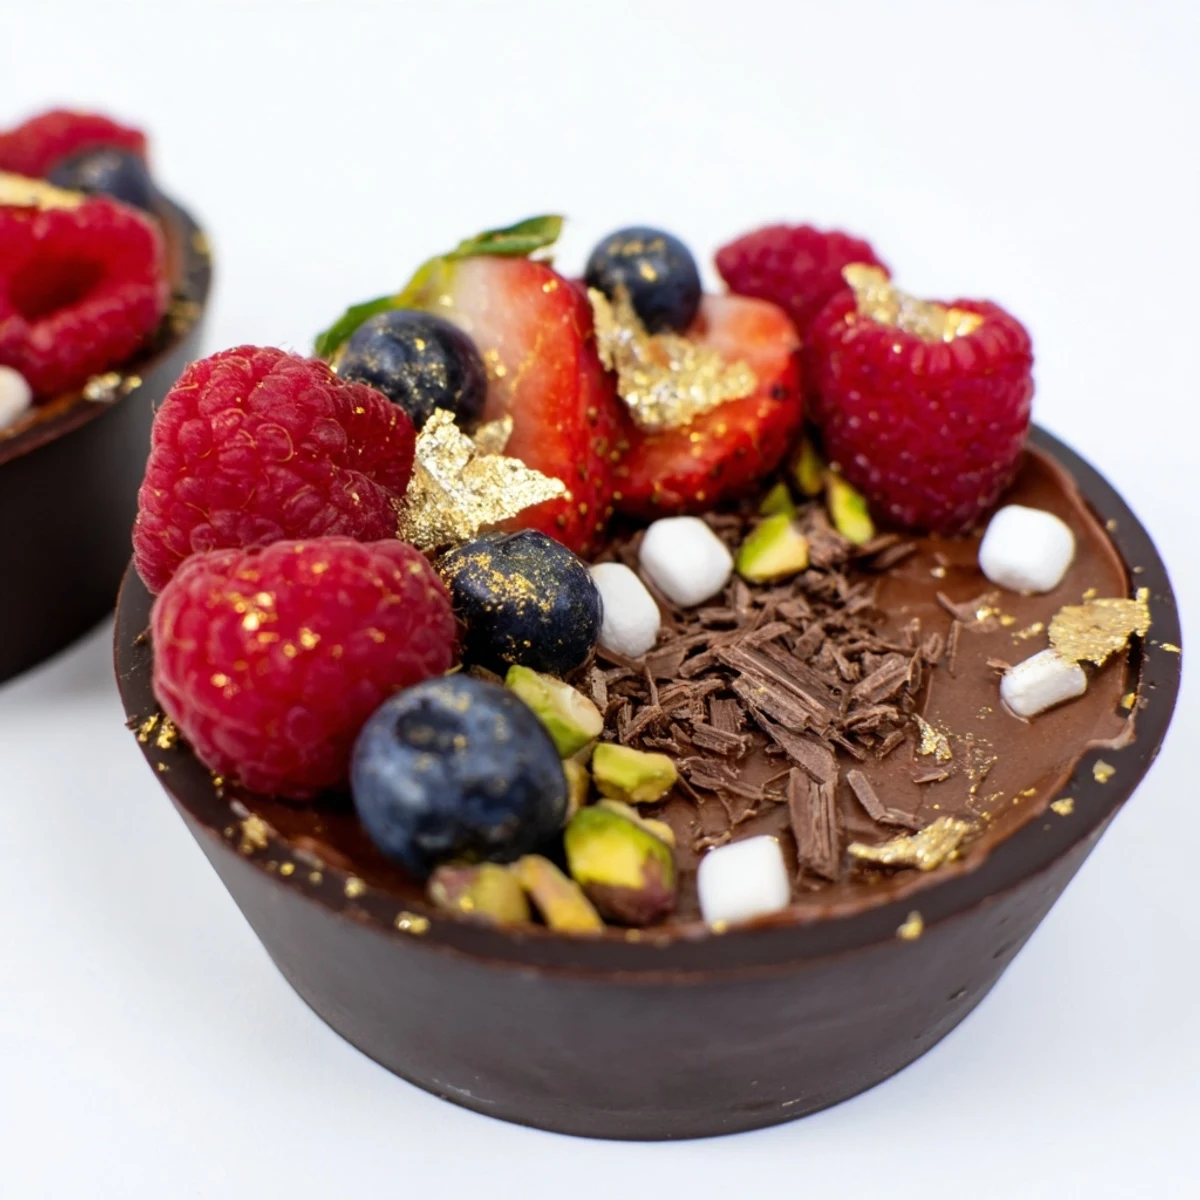
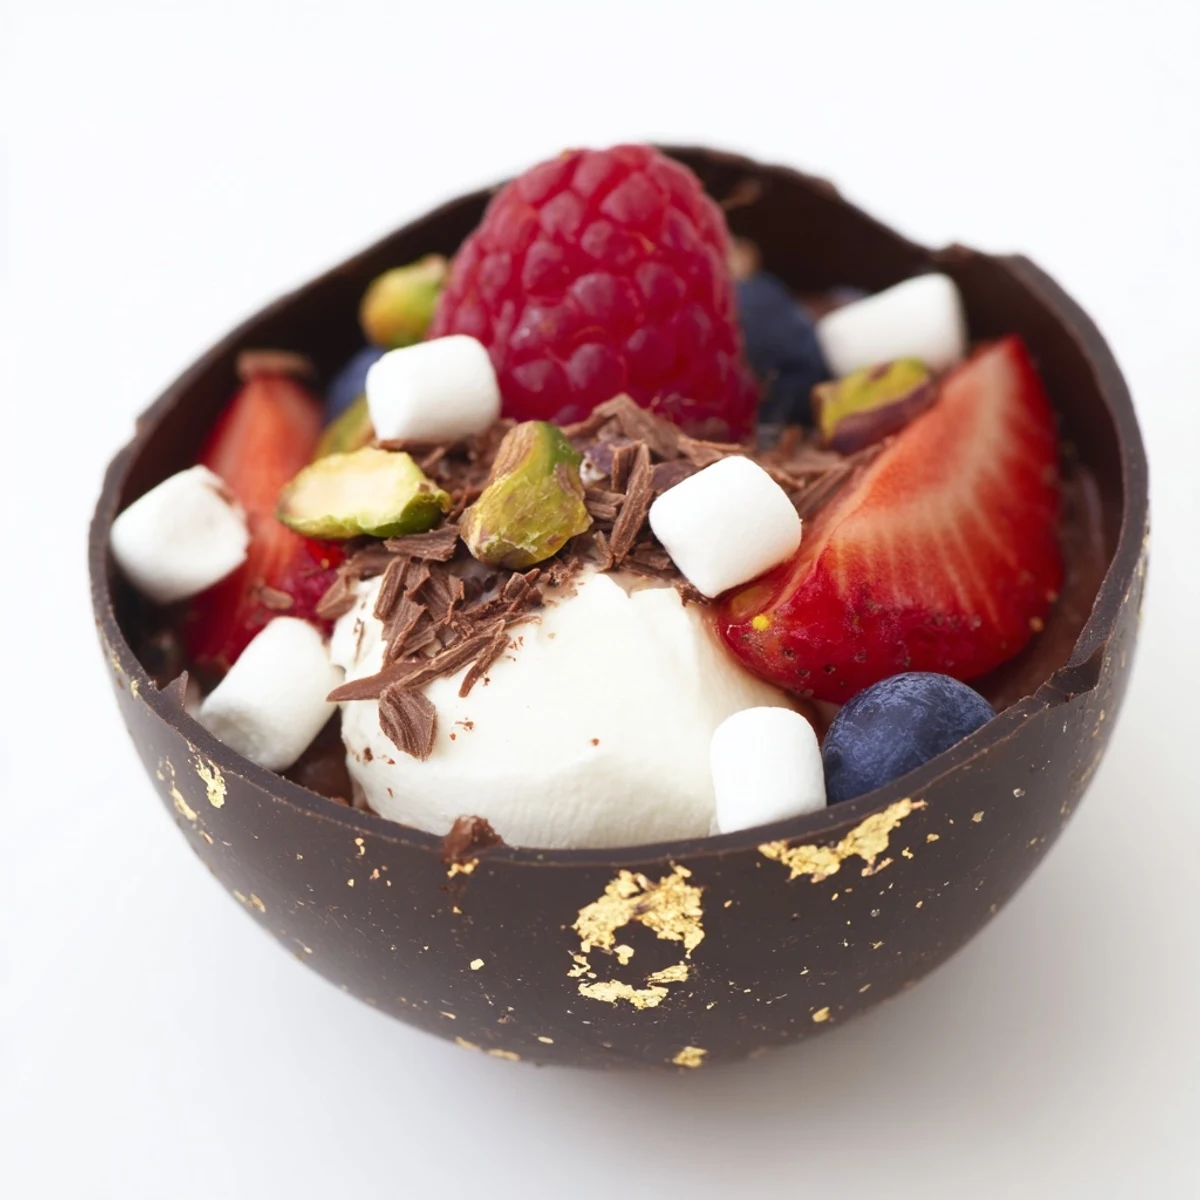
Save These sophisticated chocolate grazing cups combine the richness of dark chocolate with the lightness of homemade mousse. The edible chocolate cups provide a stunning vessel for silky smooth filling, topped with fresh berries, nuts, and decorative touches like marshmallows and chocolate curls.
Prepare the components ahead—the chocolate cups can be made in advance and stored carefully, while the mousse comes together quickly with just whipped cream and melted chocolate. The assembly becomes an artful presentation, perfect for dessert tables, parties, or intimate celebrations.
Customization options include swapping dark chocolate for milk or white varieties, adding orange liqueur for an adult version, or adjusting toppings to match seasonal fruits. Each cup delivers a perfect balance of textures and flavors in an elegant, individual portion.
The afternoon my sister got engaged, I was in charge of dessert and completely underestimated how little time I'd have between ceremony prep and the celebration. These grazing cups saved me—they look like you spent hours at a pastry school, yet everything comes together in moments. Now they're my go-to for any fancy gathering where I want to look like I have my life together.
Last Valentine's Day, I made a batch of these while my partner tried to surprise me with dinner. The kitchen smelled like melted chocolate and candlelight, and we ended up eating them standing up because neither of us could wait for the table to be set. Some meals are meant to be messy and wonderful.
Ingredients
- Dark chocolate: Using at least 60% cocoa gives these cups their intense richness and structure
- Heavy cream: Cold from the refrigerator is essential for achieving those airy whipped peaks
- Powdered sugar: Dissolves instantly into the cream without leaving grainy texture behind
- Vanilla extract: A teaspoon makes the chocolate taste deeper and more complex
- Fresh berries: Their tartness cuts through all that richness so every bite stays balanced
- Chopped nuts: Toast them beforehand for an extra layer of warm nutty flavor
- Mini marshmallows: Pure nostalgia and a fun chewy texture contrast
- Chocolate curls: Use a vegetable peeler on a room temperature chocolate bar for effortless shavings
Instructions
- Craft your chocolate cups:
- Melt the chocolate in short bursts, stirring between each until glossy and smooth. Paint the inside of each liner with a generous layer, then chill until firm and carefully peel away the liner.
- Whip the mousse base:
- Beat the cold cream with sugar and vanilla until soft peaks just hold their shape. Gently fold in your slightly cooled melted chocolate until no streaks remain.
- Build your grazing cups:
- Fill each chocolate cup about two-thirds full with that silky mousse. Pile on the berries, nuts, marshmallows, and chocolate curls until they're overflowing with joy.
 Save
Save These have become my signature for birthdays because people act like I've done something impossibly impressive. The truth is they're secretly simple, and I love seeing someone's face light up when they realize the entire cup is edible.
Making Chocolate Cups Like a Pro
The thickness of your chocolate coating determines whether the cups hold their shape or collapse tragically. I aim for about 3 millimeters, which means doing two thin coats with chilling in between. The first time I made these, I rushed and ended up with chocolate puddles instead of cups—still delicious, but not quite the presentation I imagined.
Getting the Mousse Texture Right
Folding is where most people mess up mousse, and I learned this the hard way by deflating mine into something closer to pudding. You want to incorporate the chocolate gently but thoroughly, cutting through the middle and scraping from the sides until just combined. Those tiny pockets of air are what make each spoonful feel like eating a cloud.
Customizing Your Grazing Experience
Sometimes I'll add crushed pretzels or cookie pieces for salt lovers in the crowd. Other times, fresh mint leaves make everything taste brighter and more sophisticated. The beauty of these cups is how easily they adapt to whatever you're craving or whatever ingredients you have on hand.
- Try drizzling caramel inside the cups before adding mousse for a surprise center
- A pinch of sea salt on top transforms the whole flavor profile
- These keep for a day in the fridge if you can resist eating them all immediately
 Save
Save There's something magical about handing someone a cup of pure indulgence and watching their eyes close at that first bite. Life should always have room for this kind of joy.
Recipe Questions & Answers
- → Can I make chocolate cups ahead of time?
-
Yes, prepare the chocolate cups up to 2 days in advance. Store them layered between parchment paper in an airtight container at cool room temperature. Avoid refrigeration as this can cause condensation and affect the glossy finish.
- → What's the best chocolate for making cups?
-
Dark chocolate with at least 60% cocoa content works best for cup formation—it creates a sturdy shell that holds its shape well. Higher quality chocolate produces better flavor and a smoother finish. Tempered chocolate yields the most professional results.
- → Can I substitute the heavy cream?
-
Coconut cream can replace heavy cream for a dairy-free version, though the texture will be slightly denser. For a lighter mousse, fold in beaten egg whites before combining with chocolate, though this changes the preparation method.
- → How do I prevent chocolate cups from cracking?
-
Ensure your chocolate is properly melted and smooth before brushing. Apply even, thin layers rather than thick ones—thick chocolate is more prone to cracking as it cools. Chill gradually in the refrigerator rather than the freezer.
- → What other toppings work well?
-
Fresh seasonal fruits like sliced kiwi, mango, or pomegranate seeds add color and freshness. Crushed cookies, pretzels, or candied nuts provide contrasting crunch. Shaved white chocolate, caramel drizzle, or fresh mint leaves elevate the presentation.
- → Can these be served frozen?
-
While not recommended, you can freeze assembled cups for up to 1 week. Wrap individually in plastic and thaw in the refrigerator for 2-3 hours before serving. Note that texture may become slightly denser after freezing.