 Save
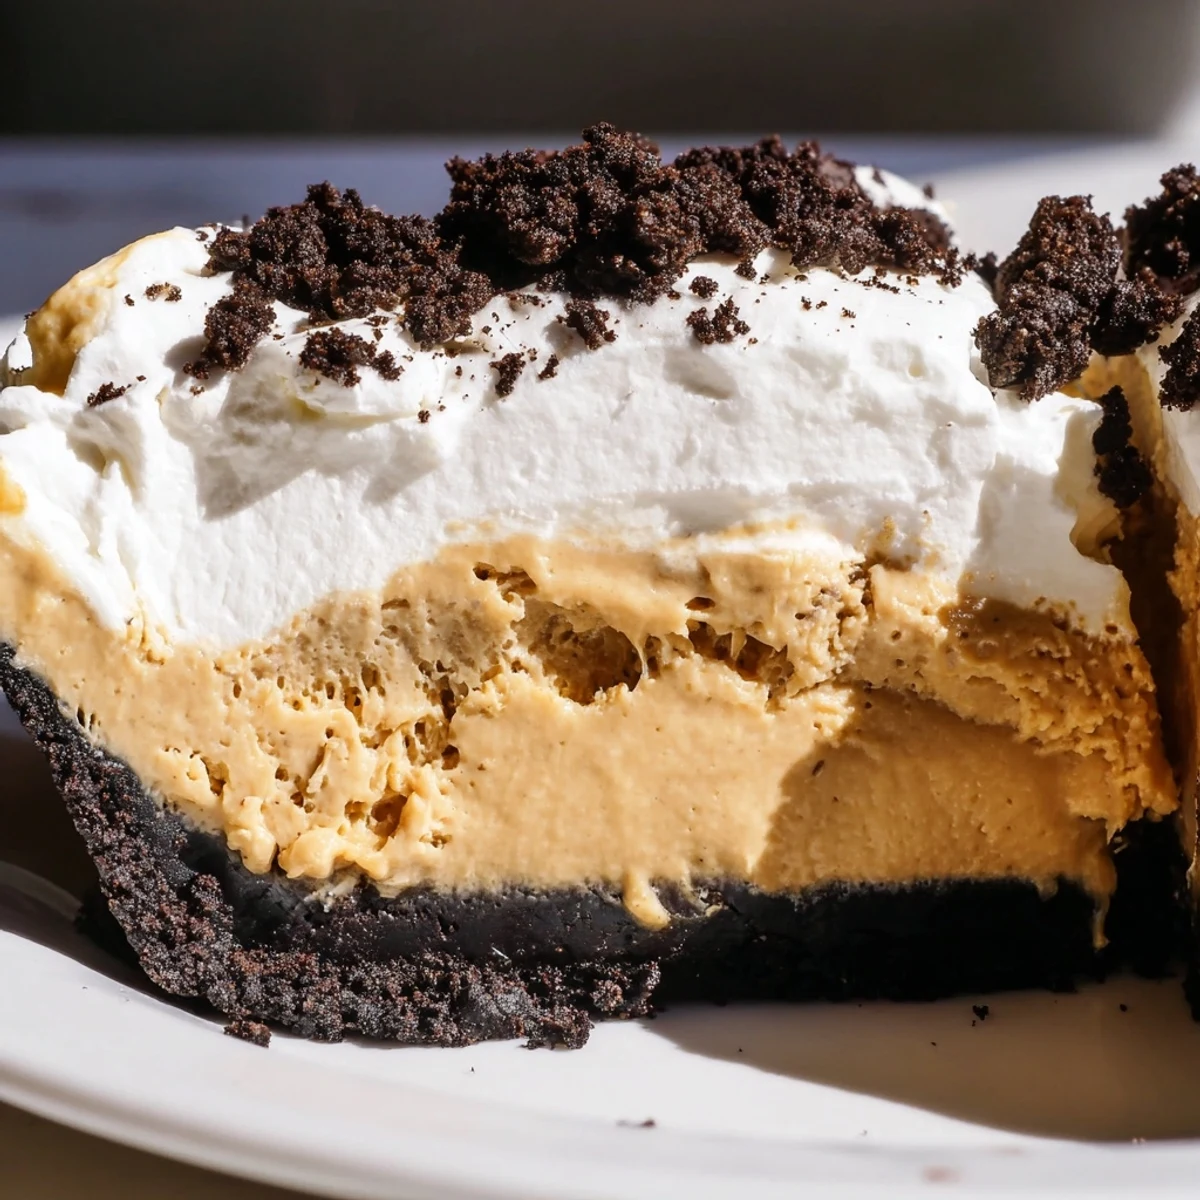
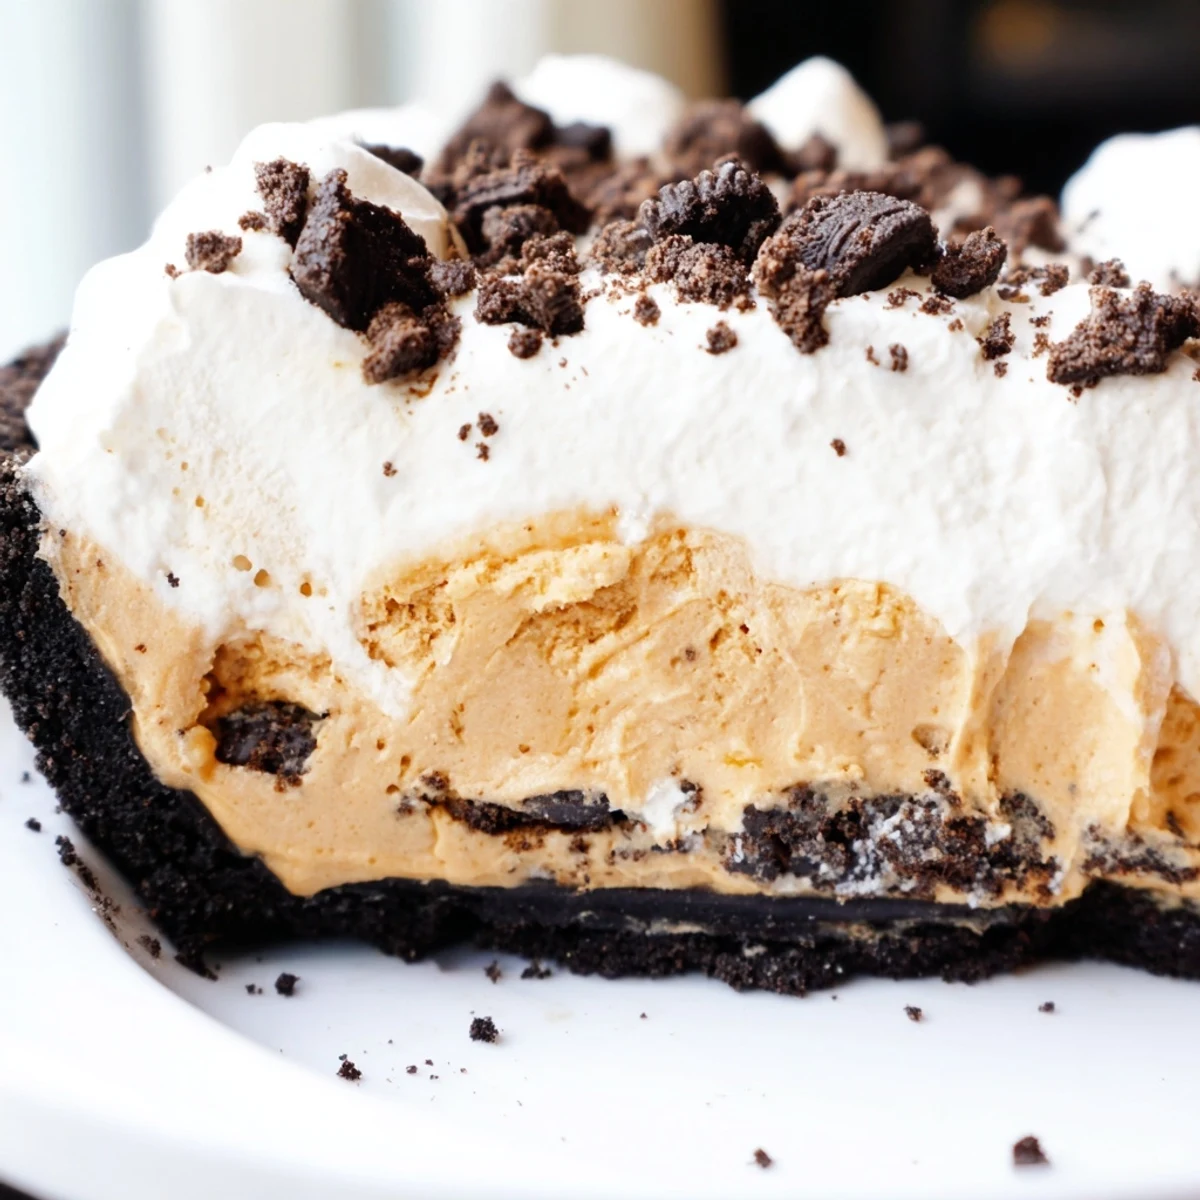
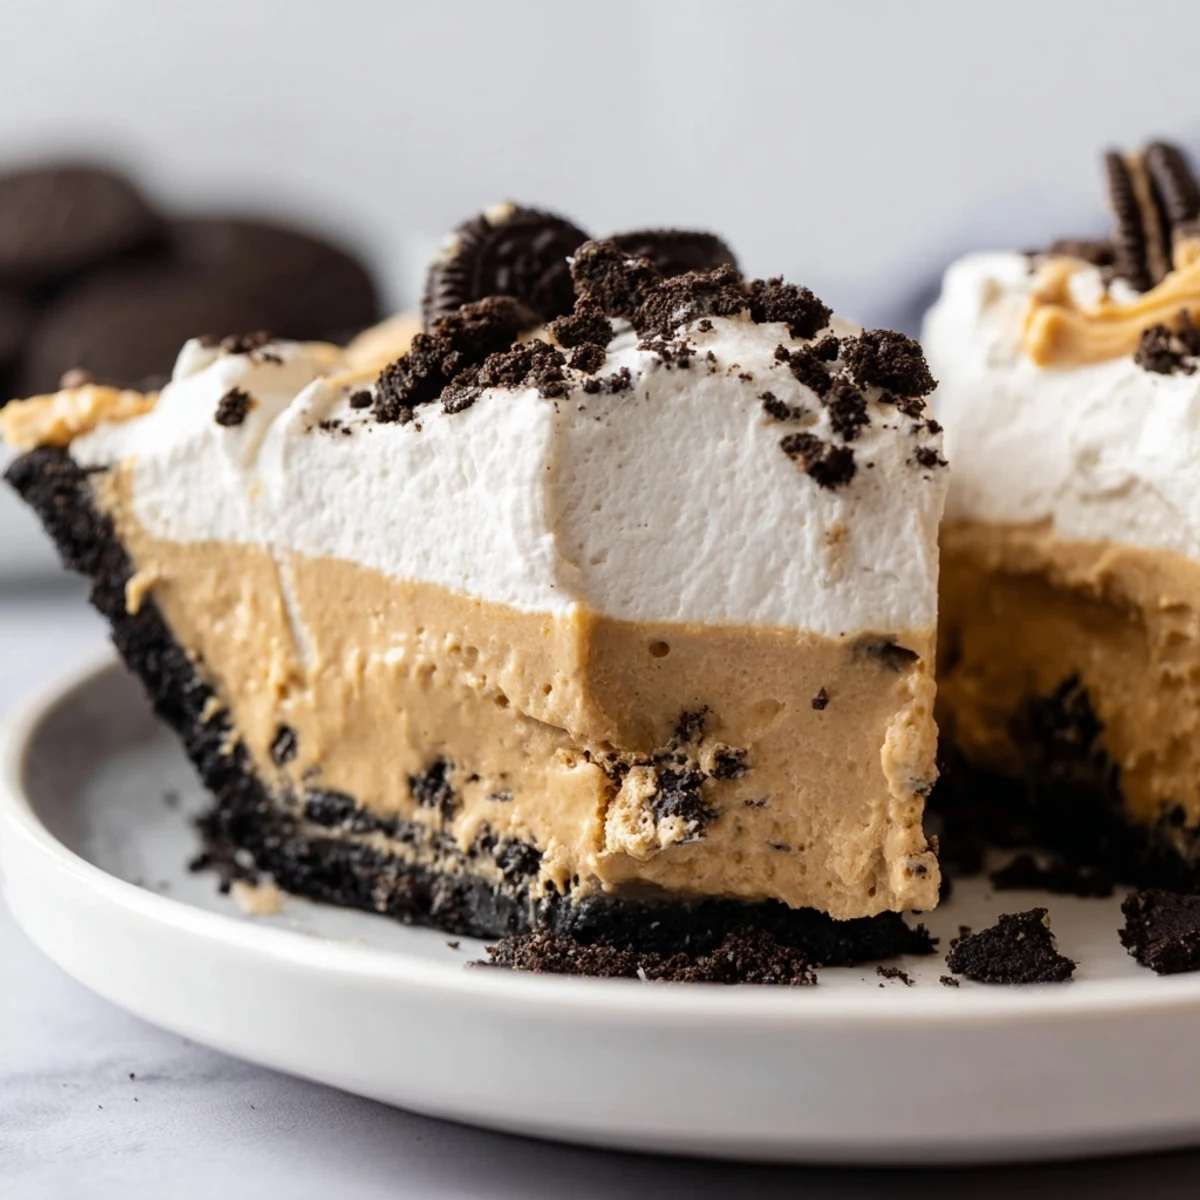
Save This decadent dessert features a luscious peanut butter and cream cheese filling, lightened with whipped cream and nestled in a crunchy homemade Oreo crust. The entire creation gets crowned with sweetened whipped cream and scattered cookie pieces for that perfect crunch contrast. Best prepared ahead with 3 hours chill time, this no-fuss dessert comes together quickly and serves eight generous portions. The combination of salty peanut butter and sweet chocolate creates an addictive flavor profile that keeps everyone coming back for seconds.
The summer I turned twelve, my grandmother taught me that some desserts don't require an oven to make people happy. We stood in her tiny kitchen with the fan whirring overhead, crushing cookies by hand because she swore it tasted better than using a machine. When she pulled that first chilled pie from the refrigerator, the way the cream held its perfect swoop against the peanut butter layer changed something in me about what dessert could be.
I brought this pie to a potluck last November when I barely knew anyone there. Within minutes of setting it down, a stranger asked for the recipe, and suddenly I was in the middle of a conversation about childhood desserts with three people I'd never met before. Food does that sometimes, breaks down walls without trying.
Ingredients
- Oreo cookies (24 for crust, 4 crushed for topping): The filling in these cookies is essential to the crust structure, so don't remove it before crushing
- Unsalted butter (5 tbsp, melted): Salted butter works too, but reduce any added salt elsewhere in the recipe
- Creamy peanut butter (1 cup): Room temperature peanut butter blends much smoother than cold from the jar
- Cream cheese (8 oz, softened): Give it at least two hours on the counter to avoid tiny lumps in your filling
- Powdered sugar (1 cup plus 2 tbsp divided): This fine sugar dissolves instantly into the creamy layers
- Heavy whipping cream (2 cups divided): Cold cream whips better, so pop the bowl and whisk in the freezer for ten minutes first
Instructions
- Build the chocolate foundation:
- Crush those 24 Oreo cookies in a food processor or with a rolling pin until they resemble damp sand. Stir in the melted butter until every crumb is coated, then press the mixture firmly into your pie dish using the bottom of a measuring cup. Bake at 350°F for exactly 10 minutes, then let it cool completely while you make the filling.
- Create the creamy peanut butter layer:
- Beat together the peanut butter and softened cream cheese until absolutely smooth with no visible lumps. Add the powdered sugar and mix until fully incorporated, then whip 1 cup of heavy cream to stiff peaks in a separate bowl. Gently fold the whipped cream into the peanut butter mixture until blended, being careful not to deflate all that air you just worked into it.
- Assemble and chill the pie:
- Spread the peanut butter filling evenly over your cooled Oreo crust, smoothing the top with an offset spatula or the back of a spoon. Refrigerate for at least 2 hours, though overnight is even better for the firmest slice.
- Add the cloud like topping:
- Whip the remaining 1 cup of heavy cream with the remaining 2 tablespoons of powdered sugar until stiff peaks form. Spread or pipe this over the completely chilled peanut butter layer, then finish with those coarsely crushed Oreo cookies sprinkled across the top.
 Save
Save My sister asked for this pie at her birthday instead of a cake for three years straight. She said something about how the peanut butter wasn't too sweet, how the crust gave it this slight crunch that made the cream feel even softer. I still make it whenever she visits, even though she lives three states away now.
Making It Your Own
Crunched for time? Use a pre made Oreo crust from the store. Want more texture? Swap half the Oreos for chocolate graham crackers or mix in chopped peanuts. The beauty here is in how forgiving the base recipe is while still feeling special.
Getting The Perfect Slice
Run your knife under hot water and wipe it dry between each cut. Dip the pie plate's rim in warm water for ten seconds if the crust feels stuck to the dish. These tiny tricks make serving look professional even on your first try.
Make Ahead Magic
This pie actually tastes better on day two, after the flavors have had time to know each other in the refrigerator. The crust softens slightly into the perfect texture, and the peanut butter deepens into something richer.
- Make the crust up to 2 days ahead and store it tightly wrapped at room temperature
- The filling can be prepared 24 hours in advance and kept covered in the refrigerator
- Wait to add the whipped cream topping until 2 hours before serving to keep it from weeping
 Save
Save Some desserts are about technique and precision, but this one is about joy in every creamy, chocolatey bite. Make it for someone you love.
Recipe Questions & Answers
- → Can I make this ahead of time?
-
Absolutely! This dessert actually improves when made ahead. You can prepare the entire pie up to 24 hours in advance, keeping it covered in the refrigerator. The flavors meld together beautifully, and the texture becomes even more firm and sliceable after proper chilling time.
- → How long does it need to chill?
-
For optimal results, refrigerate the assembled pie for at least 2-3 hours before serving. This allows the filling to set completely and makes clean slicing much easier. If you have extra time, letting it chill overnight yields the best texture and consistency.
- → Can I freeze this pie?
-
Yes, this freezes exceptionally well! Wrap the pie tightly in plastic wrap followed by aluminum foil, and freeze for up to 2 months. Thaw overnight in the refrigerator before serving. Note that the whipped cream topping may lose some volume after freezing, so consider adding fresh whipped cream when serving.
- → What type of peanut butter works best?
-
Creamy peanut butter creates the silkiest texture, but crunchy peanut butter adds delightful texture variation. Use a mainstream brand rather than natural separated peanut butter, as the emulsified versions blend more smoothly with cream cheese and create the desired velvety consistency.
- → Can I use different cookies for the crust?
-
Definitely! While classic Oreos provide that perfect chocolate crunch, you can experiment with Golden Oreos for a vanilla contrast, chocolate sandwich cookies, or even peanut butter cookies to amplify the nutty flavor. Just maintain the same ratio of about 24 cookies to 5 tablespoons melted butter.
- → How do I get clean slices?
-
The key is thorough chilling and a warm knife. Ensure your pie has chilled for at least 3 hours, then run your knife under hot water and wipe dry before cutting. Wipe the blade clean between each slice for those picture-perfect restaurant-style wedges.