 Save
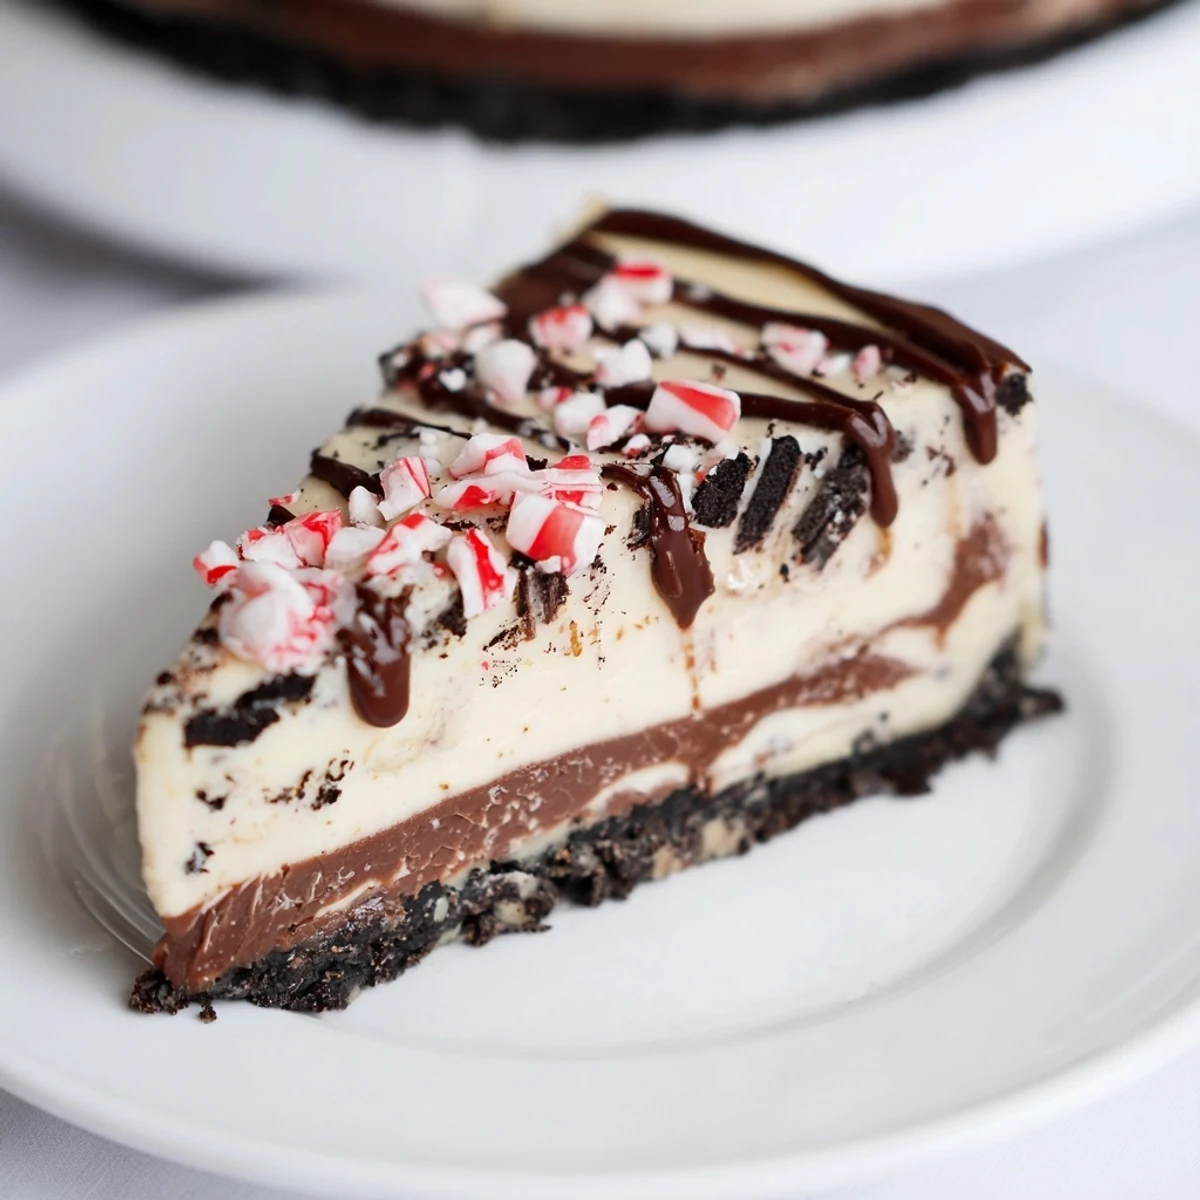
Save This luscious cheesecake blends a creamy chocolate filling with peppermint flavors, layered on a chocolate cookie crust.
Baked to a smooth finish and chilled overnight, it’s topped with festive peppermint bark pieces for a refreshing holiday twist.
The combination of bittersweet chocolate and crushed peppermint candies creates a rich yet vibrant dessert ideal for festive gatherings.
I still remember the year I decided to stop bringing store-bought desserts to our family Christmas dinner. My aunt had always made this magical peppermint bark cheesecake, swirled with chocolate and topped with crushed candy canes, and one year I thought, "I'm going to figure this out." The first attempt was dense and cracked, but somewhere between attempt three and four, I found the rhythm of it—the gentle folding, the perfect oven temperature, that moment when you crack the door and let it cool slowly. Now it's the dessert everyone asks for, and honestly, it feels like I'm sharing a little piece of that holiday magic every time I make it.
The moment I knew this recipe was a keeper was when my brother's girlfriend took one bite and closed her eyes like she was thinking about something far away. When she opened them, she just said, "This is dangerous." I realized I'd made something that didn't just taste good—it made people feel something. That's when baking shifted from following instructions to creating memories.
Ingredients
- Chocolate sandwich cookies (200 g, about 20 Oreos): The foundation that keeps everything together—I crush them until they're fine crumbs with just a little texture, not powder
- Unsalted butter (60 g or 4 tbsp), melted: This binds the crust and toasts those cookie flavors; use it while still warm for better pressing
- Cream cheese (680 g or 24 oz), softened: This is non-negotiable—take it out of the fridge an hour before so it beats smooth without lumps that hide in the batter
- Granulated sugar (200 g or 1 cup): Sweetness and structure; don't skip the creaming step or you'll have a grainy texture
- Sour cream (120 ml or 1/2 cup), room temperature: The secret to that luxurious tang that makes people say "what's in this?"
- Large eggs (3), room temperature: Temperature matters more than you'd think—cold eggs won't incorporate properly and can cause cracks
- Pure vanilla extract (1 tsp): The quiet backbone that lets the peppermint and chocolate shine
- Peppermint extract (1/2 tsp): Start here, but I often add up to 3/4 tsp depending on how bold I'm feeling and who I'm serving
- Bittersweet or semisweet chocolate (120 g or 4 oz), melted and cooled: The soul of the filling—I prefer 60/40 dark to semi because it doesn't overpower the peppermint
- White chocolate (120 g or 4 oz), chopped: The contrast that makes the drizzle pattern visible and adds sweetness to balance the dark layers
- Dark chocolate (60 g or 2 oz), chopped: Rich and slightly bitter against the peppermint—this is where you taste the sophistication
- Crushed peppermint candies or candy canes (50 g or 1/3 cup): Freshly crushed right before topping keeps them from getting sticky and makes the final presentation look homemade-beautiful
Instructions
- Get Everything Ready:
- Preheat your oven to 160°C (325°F)—a lower temperature than you might expect, but this gentleness is what keeps a cheesecake from cracking and splitting like it's angry at you. Line the bottom of your springform pan with parchment paper so the crust doesn't stick. Have all your ingredients sitting out at room temperature; this is the part where you're setting yourself up for success before the mixing even starts.
- Build Your Foundation:
- In a bowl, combine those crushed cookies with the warm melted butter—it should feel like wet sand between your fingers. Press it firmly and evenly into the bottom of the pan, using the bottom of a measuring cup to pack it down smooth. You want it compact enough that it holds together but not so dense it becomes tough. Pop it in the fridge while you make the filling; this keeps it from softening and getting mixed into everything else.
- The Creaming Part That Changes Everything:
- Beat that softened cream cheese in a large bowl until it's completely smooth—no little lumps, no streaks of unmixed cheese. This takes longer than you think, maybe 2-3 minutes. Add the sugar gradually and beat until the mixture is pale and fluffy, which tells you the sugar has dissolved and air is incorporated. This is what gives you that light, creamy texture instead of dense and heavy.
- Where the Flavor Comes Together:
- Mix in the sour cream, vanilla, and peppermint extract until just combined. Here's the thing—don't overmix. You're looking for a smooth batter, but you don't want to whip in so much air that you end up with big bubbles that rise and pop during baking, leaving little craters. Gentle and thorough is the goal.
- Adding the Eggs with Care:
- Add the eggs one at a time on low speed, mixing just until each one disappears into the batter before adding the next. This seems tedious but it's actually the difference between a silky filling and one that gets grainy or cracks. Each egg needs to be fully incorporated but you're not trying to make mousse here.
- The Part Where You Create Two Personalities:
- Divide the filling in half. Into one half, stir that melted and cooled chocolate—the cooling part matters because hot chocolate can scramble eggs. Stir gently but thoroughly until you have a uniform chocolate color with no streaks.
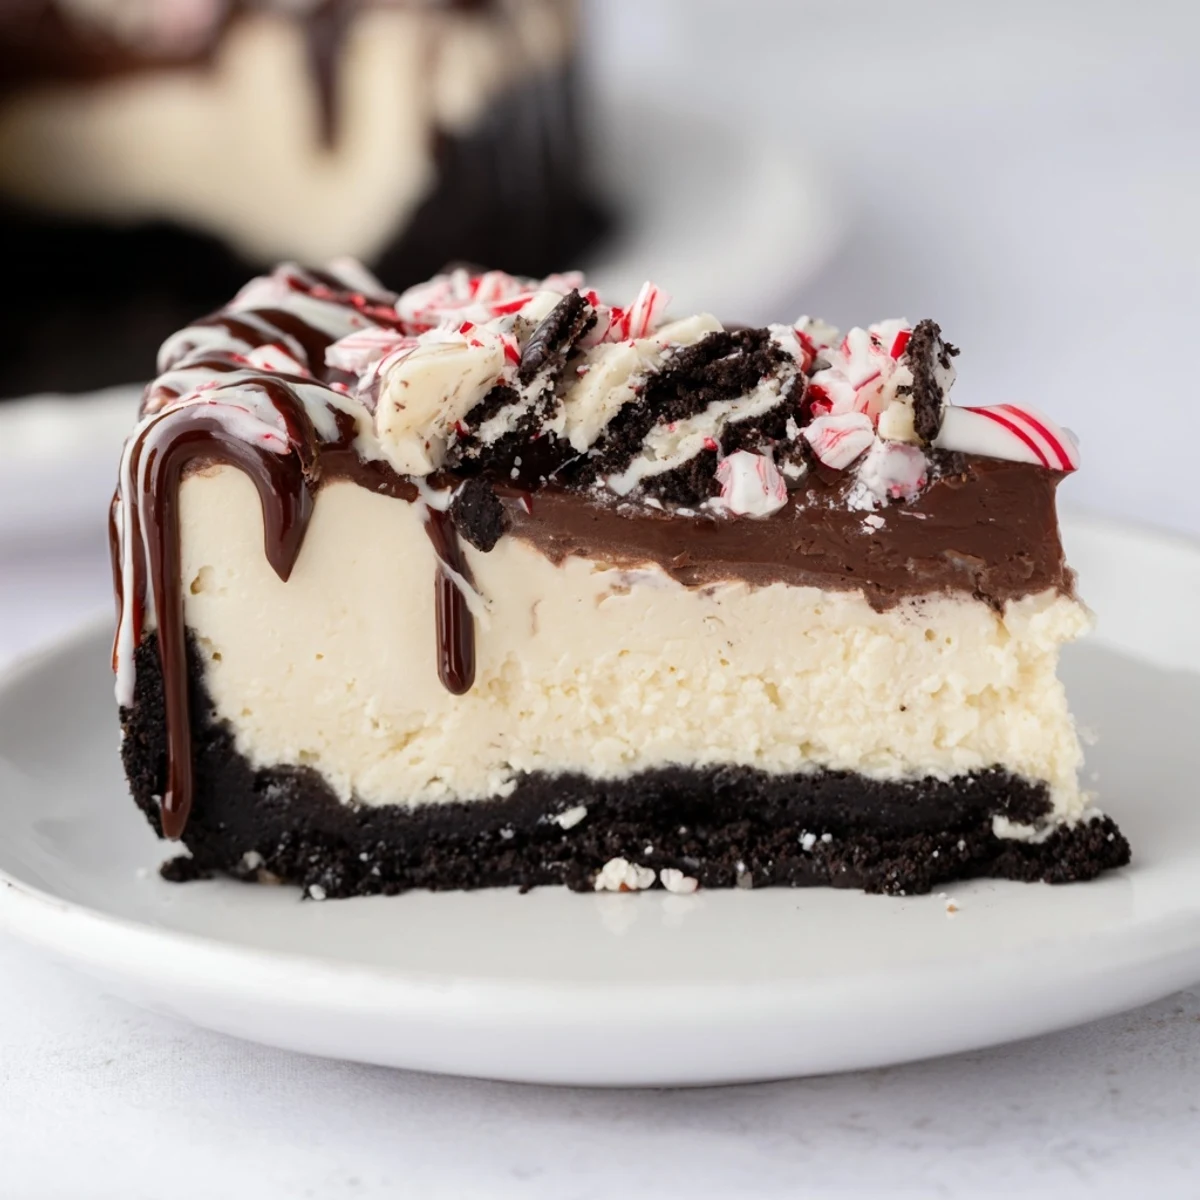
- Layering Like You Mean It:
- Pour the chocolate filling over the crust and smooth it into an even layer. Now here's the technique I learned after many wobbly attempts: gently spoon the plain peppermint filling on top in dollops, then use an offset spatula or back of a spoon to spread it smooth. You want swirls and layers, not a fully mixed ripple. The heat of the oven will cause some blending, which is exactly what you want.
- The Bake That Requires Patience and Faith:
- Bake for 55–60 minutes. You're looking for the edges to be set and pulling slightly from the sides of the pan, but the very center should still jiggle slightly when you gently shake the pan—like the last little bit of a wave. This residual heat will continue cooking it as it cools. Overbaking leads to cracks and a dense texture; underbaking leads to a soupy middle. After the time is up, turn off the oven, crack the door open about an inch, and let the cheesecake sit there for a full hour. This gradual temperature change is what prevents the surface from cracking as it cools.
- The Patience Part:
- Remove the cheesecake from the oven and let it come to room temperature on the counter for another 30 minutes or so. Then wrap it and refrigerate for at least 4 hours, though overnight is better. I know this feels eternal when you want to taste it, but this chilling is when the flavors marry and the texture sets to that perfect creamy-but-sliceable state.
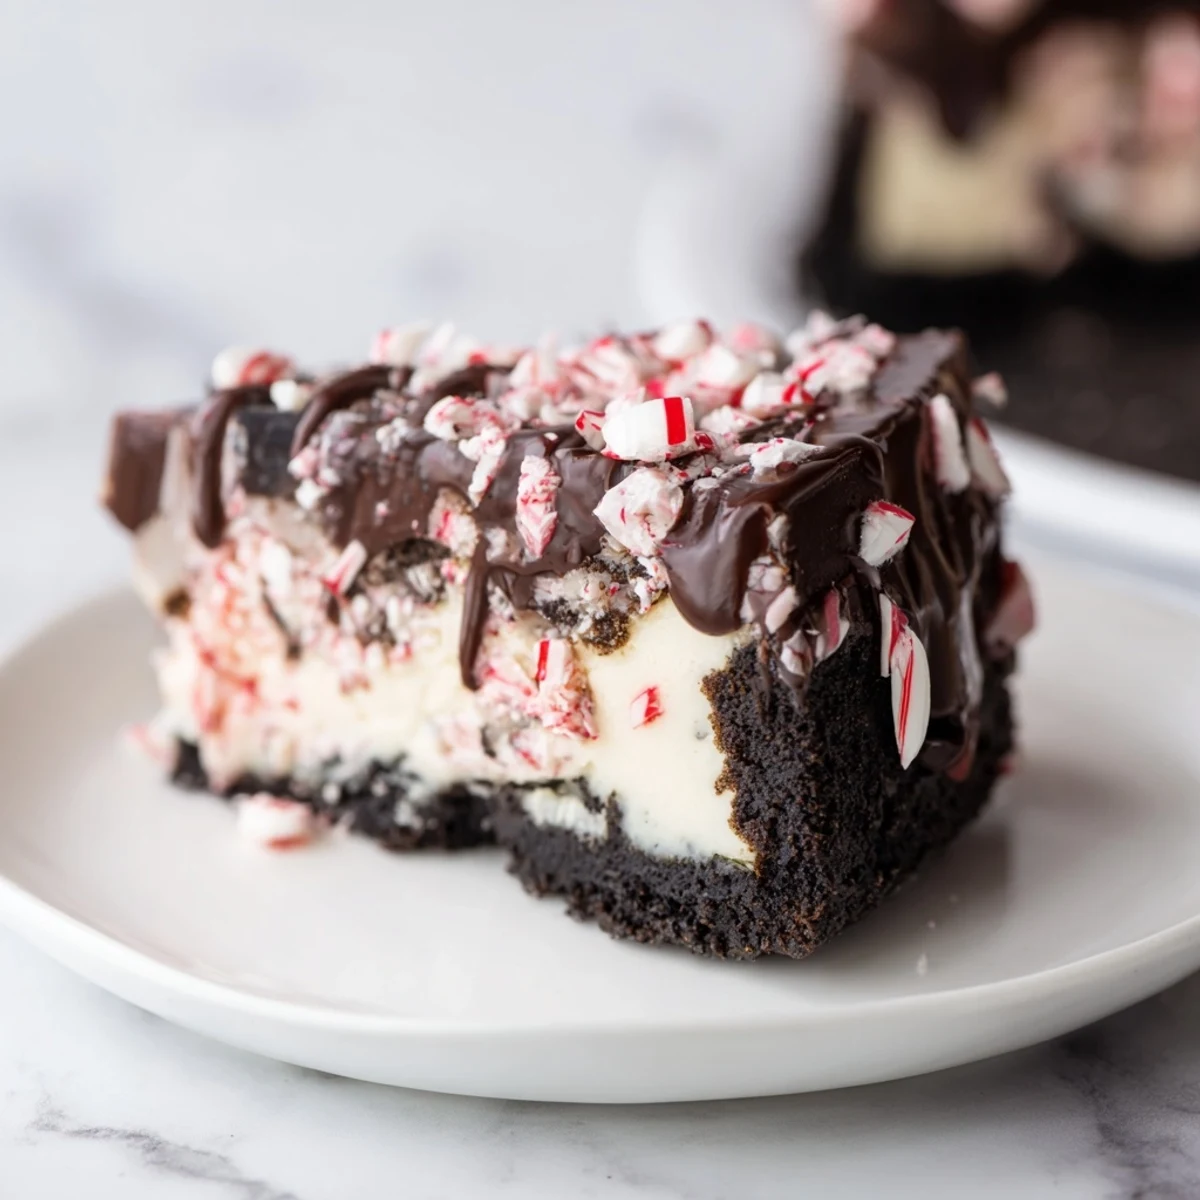
- The Grand Finale:
- For the topping, melt the white and dark chocolates separately—I use a double boiler or microwave in 30-second bursts to avoid scorching. Let them cool slightly so they're pourable but not hot. Drizzle both over the chilled cheesecake in whatever pattern makes you happy—I like to do thick stripes of dark, then thin lines of white for contrast. Right after drizzling while the chocolate is still slightly tacky, sprinkle those crushed peppermint candies over everything. They'll stick and won't sink in. Slice with a warm, wet knife between each cut, wiping the blade clean, and serve chilled.
 Save
Save I'll never forget the Christmas Eve when my neighbor came over unannounced because she'd smelled this cheesecake cooling on my porch, and we ended up sitting in my kitchen at midnight, splitting a slice and talking about everything and nothing. That's when I understood that the best recipes aren't about impressing people—they're about creating moments where people feel welcomed and remembered.
Keeping It Fresh
This cheesecake actually gets better with a day or two of chilling—the flavors deepen and the texture becomes even creamier. Store it covered in the refrigerator for up to 5 days, or wrap slices individually and freeze for up to a month. If you're freezing it, do that before adding the chocolate and peppermint topping; add those fresh when you're ready to serve. When thawing a frozen slice, move it to the fridge several hours ahead of eating—rushing this step with room temperature thawing can make it weepy.
When You're Missing Something
I've made this recipe with substitutions when pantry raids were necessary, and I've learned what works and what doesn't. If you can't find peppermint extract, use 1/4 tsp more vanilla and add a tiny pinch of menthol candy oil if you have it, or just skip it entirely and let the crushed candies on top provide the peppermint punch. For the crust, chocolate graham crackers work beautifully and taste slightly less heavy than Oreos. If you're dairy-free, there are cream cheese alternatives that bake surprisingly well, though the texture is slightly different—a bit less creamy, a bit more crumbly, but still delicious.
Serving Ideas That Clicked
This is a showstopper on its own, but I've found a few accompaniments that make it feel even more special. A simple whipped cream dusted with crushed peppermint, a small glass of dessert wine like a late-harvest Riesling, or even just strong coffee alongside it. I've also drizzled warmed chocolate sauce on individual plates before setting the slice down, creating a little pool of richness that makes people slow down and really taste. Some years I've dusted the plate with powdered sugar or crushed peppermint too. The cake is rich—a regular slice satisfies, and people generally don't want a second.
Adapting Through the Seasons
While this is undeniably a winter and holiday dessert, I've experimented with making it year-round by adjusting the toppings and flavors. In warmer months, I sometimes skip the peppermint extract and use a touch of lemon zest instead, keeping the chocolate layers but adding a lighter feel. I've also played with different candy toppers—crushed white chocolate peppermint bark in winter, crushed candy canes in the holidays, and crushed dark chocolate and raspberries in fall. The beauty of the base recipe is that it's flexible enough to transition between seasons while maintaining that special cheesecake magic that made people fall in love with it in the first place.
- Make the crust the day before if you're short on time—it actually sets up better with a full night's rest
- Don't skip the parchment paper on the pan bottom; cheesecake sticks stubbornly without it
- If you notice cracks forming as it bakes, quickly lower the oven temperature by 10 degrees and extend the baking time by a few minutes
 Save
Save This cheesecake is the kind of dessert that reminds people why they love eating, and why they love sitting at your table. Make it with care, serve it with joy, and watch it become the recipe people ask you for every year.
Recipe Questions & Answers
- → What type of cookies work best for the crust?
-
Chocolate sandwich cookies like Oreos provide a rich, sturdy base with a complementary flavor.
- → Can I substitute the peppermint extract?
-
Yes, you can adjust or omit peppermint extract depending on your flavor preference, ensuring the chilling time remains.
- → How long should the cheesecake chill for best texture?
-
Chilling for at least 4 hours, preferably overnight, is essential to set the filling and enhance flavors.
- → What’s the purpose of dividing the filling before baking?
-
Dividing allows layering of chocolate and peppermint fillings, creating distinct flavor layers and visual appeal.
- → Any tips for achieving a smooth finish?
-
Beat cream cheese thoroughly and fold in ingredients gently; bake at moderate heat and avoid overbaking for a creamy texture.