 Save
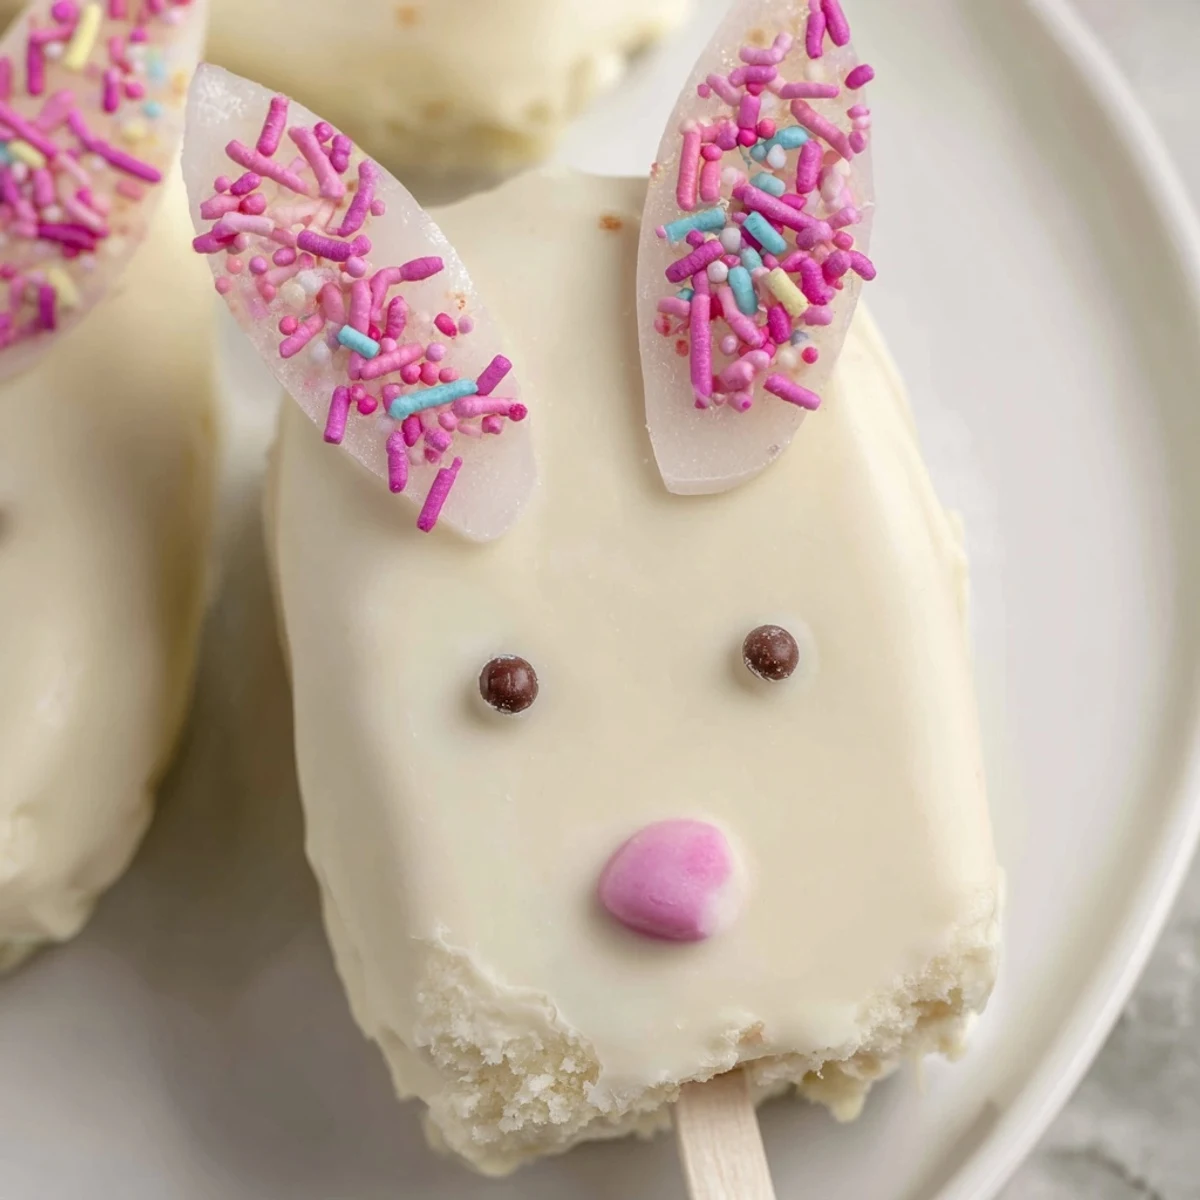
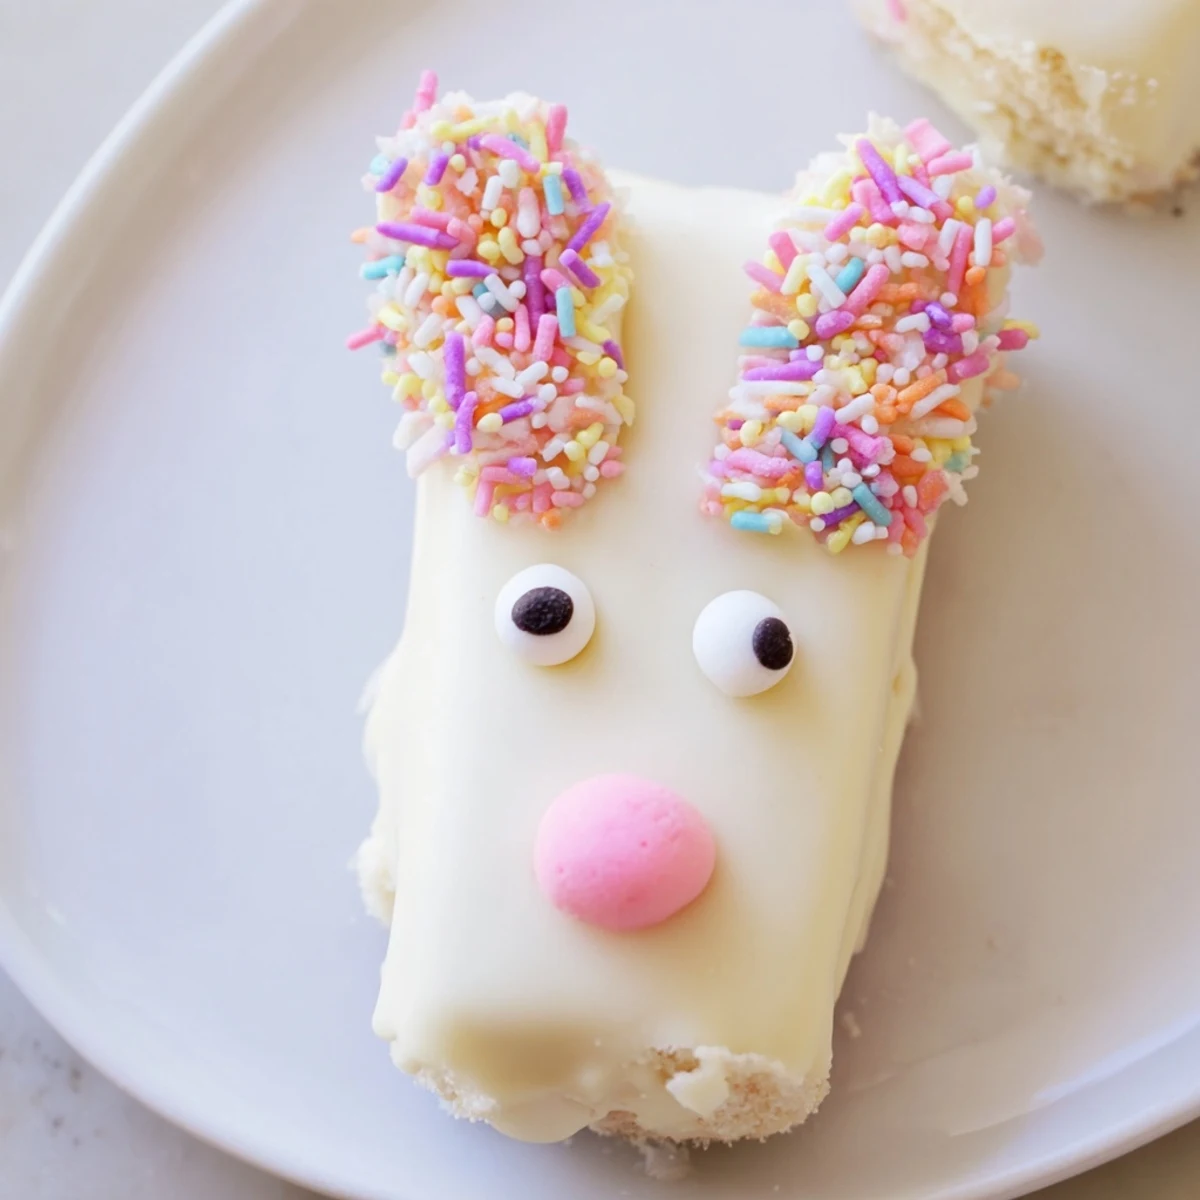
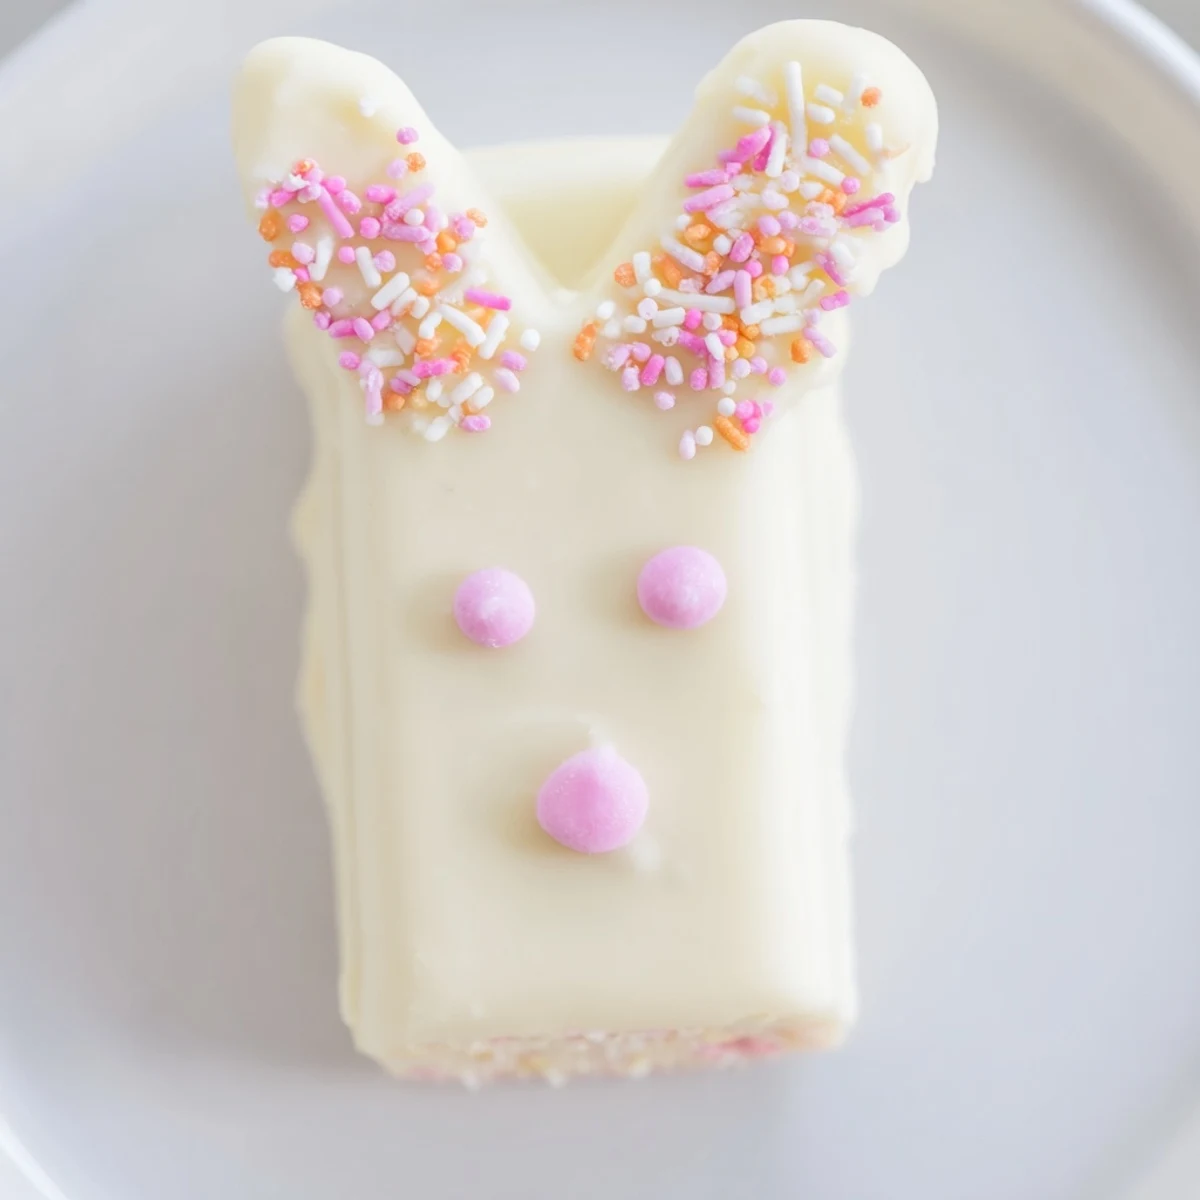
Save These charming bunny-shaped treats feature moist vanilla cake blended with cream cheese and butter, formed into playful ovals and coated in luscious white chocolate. The decorating possibilities are endless—add candy eyes, pink fondant ears, colorful sprinkles, or swirl food coloring through the coating for a marbled effect. Ready in just one hour including chilling time, these festive handheld desserts capture the spirit of spring celebrations.
My daughter discovered white chocolate bunnies in her Easter basket at age three and immediately declared they needed to be cake somehow. That April afternoon, we crumbled leftover vanilla cupcakes into a bowl, mixed in whatever frosting we had, and shaped the mess into bunny faces on sticks. They werent pretty, but she carried her lopsided creation around the house like a trophy.
Last Easter, my niece insisted we make bunny cakesicles for her entire class. We worked in the kitchen for three hours, white chocolate coating every available surface and rainbow sprinkles scattered across the floor like confetti. She left with a box of twelve slightly imperfect bunnies, grinning like shed just won the lottery.
Ingredients
- Vanilla cake crumbs: I use day-old cake or cupcake leftovers, but storebought works perfectly fine
- Cream cheese: This binds everything together without making the mixture too sweet
- Unsalted butter: Room temperature is essential here, or you will fight impossible lumps
- Powdered sugar: Just enough to add structure without turning the center into frosting
- Vanilla extract: Pure vanilla makes the difference between good and exceptional
- White chocolate: Candy melts are easier for beginners, but real white chocolate tastes incredible
- Edible gel food coloring: Necessary for those pink bunny noses and inner ears
- Cakesicle sticks: Paper straws work in a pinch, but proper sticks hold weight better
- Sprinkles and decorations: Let your creativity run wild here
Instructions
- Mix the cake mixture:
- Combine cake crumbs, cream cheese, butter, powdered sugar, and vanilla in a medium bowl until it holds together when squeezed
- Shape your bunnies:
- Divide into 8 portions and form flattened ovals with pointed ears at the top, gently inserting sticks into the base
- Chill thoroughly:
- Refrigerate for at least 20 minutes until firm to the touch, or the chocolate coating will slide right off
- Melt the white chocolate:
- Microwave in 30-second bursts, stirring between each, until completely smooth and glossy
- Dip and coat:
- Submerge each cake pop, tap off excess chocolate, and immediately place on parchment paper
- Add decorations quickly:
- Press candy eyes, sprinkles, or fondant details into the soft coating before it sets
- Set and serve:
- Let stand at room temperature for 20 minutes or refrigerate briefly until completely hardened
 Save
Save The year I made these for my book club, one member confessed she ate hers in the car before even getting home. Something about that combination of soft vanilla cake and crisp white chocolate coating makes people absolutely lose their self-control.
Making Them Ahead
I learned the hard way that these need to stay refrigerated until serving time. The white chocolate coating softens beautifully at room temperature, which is wonderful for eating but terrible for transport. Wrap each one individually in parchment paper, store them in an airtight container, and they will stay perfect for three days.
Flavor Variations
Chocolate cake crumbs with white chocolate coating became my sons absolute favorite version. The contrast is stunning, and he requests them for his birthday every year now. Lemon cake with yellow-tinted white chocolate tastes like sunshine on a spring day.
Decoration Ideas That Work
After years of experimenting, fondant bunny ears hold their shape better than any other material I have tried. The key is rolling them thin and letting them dry overnight before attaching. For the eyes, I have found that tiny chocolate chips positioned sideways look more alive than candy eyes.
- Use tweezers for placing tiny sprinkles precisely
- Let each decoration set completely before moving to the next side
- Work with one cakesicle at a time while the chocolate is wet
 Save
Save These bunny cakesicles have become the most requested Easter treat in my house. Watching kids and adults alike get excited about their dessert makes all the white chocolate mess worth it.
Recipe Questions & Answers
- → Can I make these ahead of time?
-
Yes, you can prepare the cake mixture and shape the bunnies up to 2 days in advance. Store them in an airtight container in the refrigerator, then dip and decorate when ready to serve. Once coated, they'll stay fresh for 3 days in the fridge.
- → What type of cake works best?
-
Vanilla cake crumbs provide a neutral base that pairs perfectly with white chocolate. However, you can use chocolate, lemon, red velvet, or any favorite flavor. Store-bought cupcakes or cake trimmings work wonderfully—just ensure they're not overly moist before mixing.
- → How do I prevent the coating from cracking?
-
Make sure your cake shapes are thoroughly chilled before dipping—the cold helps the chocolate set quickly. Also, avoid overheating the white chocolate when melting; use 30-second intervals and stir between each burst. Room temperature dipping works best.
- → Can I use candy melts instead of real white chocolate?
-
Absolutely! White candy melts are excellent for coating and often easier to work with since they're formulated specifically for dipping. They come in various colors, so you can create pastel bunnies without needing food coloring.
- → What if I don't have cakesicle molds?
-
Molds aren't necessary! Simply shape the mixture into flattened ovals by hand, insert the sticks, and chill. The rustic, handmade look adds to their charm. If you want uniform shapes, use a small egg-shaped cookie cutter as a guide.
- → How do I transport these without damage?
-
Place each finished treat in a small clear treat bag tied with a ribbon, or stand them upright in a sturdy container with foam or parchment paper between layers. Keep them refrigerated until gifting to maintain the coating's shine.